It’s awesome that we now have Hawk support in Thinktecture IdentityModel!
I don’t know why it’s taken me this long to add anti-clickjacking support, but I finally needed it myself today so I added it to Thinktecture IdentityModel. If you’re not familiar with clickjacking, it’s an attack where your HTML is loaded into an <iframe> and the end user is tricked into clicking links or buttons in you app without their knowledge. To thwart clickjacking each of your pages needs to emit an X-Frame-Options HTTP response header to inform the browser your application’s requirements for running in an <iframe>.
To emit the X-Frame-Options HTTP response header I devised a FrameOptionsAttribute MVC response filter class. To protect a page in MVC you’d simply apply the [FrameOptions] attribute to a controller or action method and the filter will emit the X-Frame-Options header. By default DENY is emitted (the most restrictive/secure option), but the constructor overloads allow other options. Here are a few examples (from the sample) of how you’d use it:
[FrameOptions]
public ActionResult DenyImplicit()
{
    return View();
}

[FrameOptions(FrameOptions.Deny)]
public ActionResult Deny()
{
    return View();
}

[FrameOptions(FrameOptions.SameOrigin)]
public ActionResult SameOrigin()
{
   return View();
}

[FrameOptions("http://localhost:23626")]
public ActionResult CustomOrigin1()
{
   return View();
}

[FrameOptions("http://foo.com")]
public ActionResult CustomOrigin2()
{
   return View();
}
The FrameOptions.Deny setting indicates that the response is never allowed in an <iframe>. FrameOptions.SameOrigin indicates that the response is only allowed in an <iframe> if the hosting page is from the same origin. FrameOptions.CustomOrigin indicates that the response is only allowed in an <iframe> if the hosting page is from the specified origin (which is passed to the FrameOptionsAttribute constructor).
If the origin needs to be generated dynamically, you can derive from the FrameOptionsAttribute class and override the GetCustomOrigin method, as such:
public class MyDynamicFrameOptionsAttribute : FrameOptionsAttribute
{
   public MyDynamicFrameOptionsAttribute()
      : base(FrameOptions.CustomOrigin)
   {
   }

   protected override string GetCustomOrigin(HttpRequestBase request)
   {
      // do your DB lookup here
      if (request.Url.Host == "someHostITrust" || request.Url.Host == "localhost")
      {
         var origin =
            request.Url.Scheme +
            "://" +
            request.Url.Host + (request.Url.Port == 80 ? "" : ":" + request.Url.Port);
         return origin;
      }

      return null;
   }
}
HTH
Announcing Thinktecture AuthorizationServer
Today at NDC I announced Brock’s and my new open source project – Thinktecture.AuthorizationServer.
AuthorizationServer (AS from now on) is an implementation of the OAuth2 patterns I described here.It has an implementation of the four OAuth2 flows and a nice UI that let’s you model your applications, clients and scopes. It also includes samples that you can go through to see what it does.
I am still at NDC and will publish all the slides and more information in the next days. Brock will give us more details on the administration side of things.
I am really glad the talks went so well and that the attendees liked our approach to API authorization. If you care, have a look at the repo and give us feedback – we are still in very early stages.
https://github.com/thinktecture/Thinktecture.AuthorizationServer
I just added a custom configuration section in Thinktecture IdentityModel that will automatically drive the various SAM and FAM helper functions I added a while ago. The configuration looks something like this:
<configuration>
  <configSections>
    <section name="securitySessionConfiguration"
             type="Thinktecture.IdentityModel.Web.Configuration.SecuritySessionSection, Thinktecture.IdentityModel"/>
  </configSections>

  <securitySessionConfiguration
    sessionTokenCacheType="WebRP.EF.EFTokenCacheRepository, WebRP"
    useMackineKeyProtectionForSessionTokens="true"
    defaultSessionDuration="01:00:00"
    persistentSessionDuration="01:00:00:00"
    cacheSessionsOnServer="true"
    enableSlidingSessionExpirations="true"
    overrideWSFedTokenLifetime="true"
    suppressLoginRedirectsForApiCalls="true"
    suppressSecurityTokenExceptions="true"
  />
</configuration>
With this in place you no longer need to explicitly invoke the various PassiveSessionConfiguration or PassiveModuleConfiguration APIs from global.asax. Also, each of these attributes is optional so you only need to specify the ones you care about.
HTH
Demos — 6th Annual Hartford Code Camp 2013
Demos and slides for my sessions are here.
Links for topics I mentioned:
- DevelopMentor classroom training
- DevelopMentor online training
- Thinktecture IdentityModel security library
- Thinktecture IdentityServer Identity Provider/STS
Thanks for coming.
In ASP.NET WebAPI (with its recent OData additions) there is good support for HTTP PATCH requests via the Delta<T> class. I won’t bother reproducing a tutorial here since there’s already a good one online.
The only problem with the PATCH support and tutorial is that there is no guidance on how to validate the model once you’ve accepted the partially updated data. So here’s what I came up with to validate the model once we’ve called Patch:
public HttpResponseMessage Patch(Guid id, Delta<TenantData> data)
{
    var tenant = this.TenantRepository.Get(id);
    if (tenant == null) return Request.CreateResponse(HttpStatusCode.NotFound);

    data.Patch(tenant);

    // this is where we do the validation on the model after we've
    // merged in the patch values
    var svc = this.Configuration.Services;
    var validator = svc.GetBodyModelValidator();
    var ad = svc.GetActionSelector().SelectAction(this.ControllerContext);
    var ac = new HttpActionContext(this.ControllerContext, ad);
    var mp = svc.GetModelMetadataProvider();
    if (!validator.Validate(tenant, typeof(TenantData), mp, ac, "data"))
    {
        // validation failed, so return our error and pass along the
        // ModelState from the action context (which is a different
        // instance than this.ModelState)
        return Request.CreateErrorResponse(HttpStatusCode.BadRequest,
                                           ac.ModelState);
    }

    this.TenantRepository.SaveChanges();

    return Request.CreateResponse(HttpStatusCode.OK, tenant);
}
In essence, I needed to manually trigger validation that normally happens during model binding. I wish there was a nice API built-in for this, but alas there is not.
6th Annual Hartford Code Camp 2013
I’ll be speaking at the 6th Annual Hartford Code Camp on May 18th, 2013. I’ll be presenting two topics: one on Claims-based Security with Windows Identity Foundation and another on Securing ASP.NET WebAPI Services. Hope to see you there!
Getting JSON web tokens (JWTs) from ADFS via Thinktecture IdentityServer’s ADFS Integration
Dominick and I recently added three features to IdentityServer that collectively we call “ADFS Integration”. This “ADFS Integration” is a new protocol (which can be enabled, disabled and configured like any other protocol IdentityServer supports). In short this new protocol helps obtain JWTs (indirectly) from ADFS (or really any WS-Trust enabled STS). I’ll describe the three use cases here and how we provide a solution for each:
Scenario #1 — Converting SAML to JWT for delegation-like use:
Imagine you’re building a website that authenticates users by accepting SAML tokens from an ADFS STS that your app trusts (standard WS-Fed). Your app then wants to invoke a WebAPI using the end-user’s identity (a delegation-like scenario). The WebAPI trusts ADFS and wants to leverage all the features of ADFS in producing the token for the WebAPI (such as the authorization rules, claims issuance rules, etc.), but the WebAPI only wants to accept JWTs. How does your web app get a JWT from ADFS for the WebAPI?
If the WebAPI accepted SAML tokens, then this wouldn’t be a problem — the web app would just use WS-Trust and obtain a delegation token directly from ADFS for the WebAPI. But the main obstacle is the JWT requirement.
Solution #1 — IdentityServer’s ADFS SAML authentication:
IdentityServer now supports a new ADFS integration endpoint which can be used to obtain a JWT from a SAML token. For the above scenario, the web application would need to preserve the original SAML token via WIF’s “maintain bootstrap token option”. The web app would then contact the ADFS integration endpoint in IdentityServer passing the SAML token and the realm for which it requires a delegation token (this would be the realm identifier for the WebAPI). IdentityServer would then do the necessary calls to ADFS to obtain a new SAML token for the WebAPI and then IdentityServer will finally convert the SAML token into a JWT and return it to the web application. The web application can then use that as the token when invoking the WebAPI.
For this magic to happen, there is some configuration required in ADFS. First, IdentityServer needs to be configured as a claims provider trust. Second, the WebAPI needs to be configured as a relying party. But with those two configuration settings (and any other rules related to authorization and claims desired) you are really just using the normal features of ADFS to create the token for the WebAPI.
As far as implementation details, essentially IdentityServer is using the bootstrap token to create its own token for the user (as a claims provider trust). It then calls the normal WS-Trust federation endpoints to have ADFS create a token for the WebAPI RP using the token from IdentityServer as the authentication mechanism. So, this isn’t truly creating a delegation token in the sense that the delegation chain is maintained, but the token can be used like a delegation token to pass the end-user’s identity to downstream relying parties.
The configuration needed in IdentityServer for this solution looks as follows:
 You need to:
- Enable the ADFS Integration protocol
- Enable the SAML authentication option
- Indicate a token lifetime
- Disable the Pass-thru authentication token option (otherwise SAML will be returned not JWT)
- Indicate the ADFS federation endpoint (the mixed/symmetric/basic256 WS-Trust endpoint)
- Indicate the ADFS identifier
- Indicate the ADFS signing certificate thumbprint
- Indicate the ADFS encryption certificate
Scenario #2 —Converting JWT to JWT for delegation-like use:
Now imagine you’re building the WebAPI application being invoked from the web app mentioned above. You’ve received a JWT that authenticates the user (and it’s audience is for your application), but you then want to invoke a second WebAPI delegating the user’s identity. We have almost the same problem as above – the second WebAPI wants ADFS to produce the token but wants it in JWT form. The only difference in this scenario is that the app has a JWT for the user and not a SAML token.
Solution #2 — IdentityServer’s ADFS JWT authentication:
The solution here is almost identical to the solution above. The ADFS integration endpoint can accept a SAML token (as described above) but it will also accept a JWT. So really this one endpoint solves both scenario #1 and scenario #2.
In IdentityServer the same configuration would be needed as above, except you would also need to enabled the “Enable JWT authentication” option.
Scenario #3 — Obtaining JWT for AD users from a native/mobile app:
Imagine you’re building a native mobile application (iOS, Android, etc.) for your company and it needs to invoke a WebAPI with the user’s identity. Same as above, the WebAPI want ADFS to produce the token but wants it in JWT form. These mobile platforms don’t have native AD authentication or WS-Trust libraries and yet need some means to authenticate the user and get a JWT for the WebAPI.
Solution #3 — IdentityServer’s ADFS password authentication:
The final credential type that the ADFS integration endpoint supports is username and password. The native application will collect the user’s credentials and, similar to the other two scenarios, it will pass to IdentityServer those credentials and the realm identifier for the WebAPI it wants to invoke. IdentityServer will contact ADFS and return a JWT to the native app. The native app can use that as the token when calling the WebAPI.
If this last scenario is all you needed, then the minimal configuration needed in IdentityServer would be this:
 You need to:
- Enable the ADFS Integration protocol
- Enable the password authentication option
- Indicate a token lifetime
- Disable the Pass-thru authentication token option (otherwise SAML will be returned not JWT)
- Indicate the ADFS username endpoint (the username/mixed WS-Trust endpoint)
- Indicate the ADFS signing certificate thumbprint
The one last thing I’ll say after this new ADFS integration feature — when IdentityServer converts a SAML token from ADFS into a JWT it is signing the JWT with its signing key. So this means that the signing thumbprint all the relying parties trust need to be that of IdentityServer. This might be different than the signing key of ADFS, or it could be the same — this configuration choice would be up to you. But this is a detail that is important to be aware of.
There are two samples that illustrate exercising these endpoints. First there’s a sample that just invokes the endpoints and second there’s a more full fledged sample that illustrates the real flow through the web application and then to two downstream relying party WebAPI apps.
Feedback welcome and enjoy!
CORS open source contribution to ASP.NET and System.Web.Cors
Dominick is the person who convinced me to build the CORS implementation in Thinktecture IdentityModel. I didn’t realize it would be used as much as it has. Given the popularity and the need for something built into ASP.NET (and specifically WebAPI), I submitted my CORS implementation as a contribution to the ASP.NET web stack. Microsoft accepted my contribution and I worked with them for a couple of weeks to rework the design for inclusion into the platform.
I’m happy to announce that today Microsoft (specifically Yao, who was a pleasure to work with) did the checkin into the master branch to support CORS in the ASP.NET web stack. This means we’ll have framework support for CORS in the next release of WebAPI. It also means that I get the honor and privilege to be listed as a contributor to ASP.NET.
Yao has already provided some initial documentation here.
Edit: Here’s the Channel9 interview related to this.
Thinktecture IdentityServer now supports localization
Thanks to the contribution by Sébastien and Bruno, IdentityServer now supports localization! They performed the work to allow localization and provided the default English and French translations. I just performed the merge today and it was a large one (467 changed files) which illustrates the effort they put into it. Merci!
If anyone else is interested in providing the translations to other languages, feel free to contact us and we can discuss!
Demos — DevWeek 2013
Despite being completely exhausted, I had a great time at my first DevWeek. It was great chatting with the attendees as well as the other speakers.
The sessions I presented were:
- Day-long pre-conference session: A day of jQuery and jQuery Mobile
- Async ASP.NET
- Internals of security in ASP.NET
- Mobile development with MVC 4 and jQuery Mobile
- Day-long post-conference session: A day of identity and access control for .NET 4.5 (co-speaking with Dominick)
The demos for the talks are located here. Also, links to the various open source projects mentioned are:
Many thanks to all for a great week.
Dynamic issuer name registry direct from STS federation metadata with Thinktecture IdentityModel
In order for a RP to trust a token issued by an STS it must be configured with the public key (or public key thumbprint) from the STS’ metadata. These keys expire and thus periodically the RP must be updated. For a large number of RPs this is a non-trivial task. Therefore it is desirable to have an automated or dynamic mechanism for updating an RP with the set of signing keys used by a STS.
In order to always have the latest federation metadata from the STS, a MetadataBasedIssuerNameRegistry class was added to Thinktecture IdentityModel. It is configured with the issuer name desired to be used by the RP and the URL of the STS’s federation metadata endpoint and then loaded at runtime to discover the STS’ signing keys and those are used to build the WIF’s issuer name registry.
The MetadataBasedIssuerNameRegistry can be configured in web.config:
<system.identityModel>
  <identityConfiguration>
    <issuerNameRegistry
       type="Thinktecture.IdentityModel.Tokens.MetadataBasedIssuerNameRegistry,
             Thinktecture.IdentityModel">
      <trustedIssuerMetadata issuerName="sts"
                             metadataAddress="https://localhost/sts/FederationMetadata/2007-06/FederationMetadata.xml">
      </trustedIssuerMetadata>
    </issuerNameRegistry>
The <trustedIssuerMetadata> element has attributes for the issuer name and the URL for the federation metatadata.
The MetadataBasedIssuerNameRegistry can also be configured code from global.asax:
protected void Application_Start()
{
    FederatedAuthentication.FederationConfigurationCreated +=
        FederatedAuthentication_FederationConfigurationCreated;

    ...
}

void FederatedAuthentication_FederationConfigurationCreated(
    object sender, FederationConfigurationCreatedEventArgs e)
{
    var url = "https://localhost/sts/FederationMetadata/2007-06/FederationMetadata.xml";

    e.FederationConfiguration.IdentityConfiguration.IssuerNameRegistry =
        new MetadataBasedIssuerNameRegistry(new Uri(url), "sts");
}
The main downside with the MetadataBasedIssuerNameRegistry is that the metadata is loaded each time the RP application starts. It was then desired to provide a caching mechanism on top of the MetadataBasedIssuerNameRegistry, and thus the CachingMetadataBasedIssuerNameRegistry was also developed.
The CachingMetadataBasedIssuerNameRegistry inherits from MetadataBasedIssuerNameRegistry and simply provides caching logic on top of the dynamically loaded metadata. The cache is abstracted with an IMetadataCache interface so different implementations can be provided as needed.
The IMetadataCache definition is:
public interface IMetadataCache
{
    TimeSpan Age { get; }
    byte[] Load();
    void Save(byte[] data);
}
Given the semantics of the metadata there is only one item (as a byte[]) that needs to be cached. Its age is needed for repopulating the cache. For reference a file system based implementation is provided and is called FileBasedMetadataCache.
Configuring the CachingMetadataBasedIssuerNameRegistry can be done in web.config:
<issuerNameRegistry
     type="Thinktecture.IdentityModel.Tokens.CachingMetadataBasedIssuerNameRegistry,
           Thinktecture.IdentityModel">
  <trustedIssuerMetadata issuerName="sts"
                         metadataAddress="https://localhost/sts/FederationMetadata/2007-06/FederationMetadata.xml"></trustedIssuerMetadata>
  <metadataCache cacheDuration="30"
                 cacheType="Thinktecture.IdentityModel.Tokens.FileBasedMetadataCache,
                            Thinktecture.IdentityModel"
                  >
    <file path="c:\demos\cache.xml"></file>
  </metadataCache>
</issuerNameRegistry>
The <trustedIssuerMetadata> configuration is the same as before. The <metadataCache> element provides a cacheDuration attribute for the number of days to cache the metadata. There is also a cacheType attribute that indicates the class that implements the IMetadataCache interface. As displayed above, the FileBasedMetadataCache supports its own <file> configuration element to indicate the path to the file. The IIS worker process identity will require write privileges to this file.
Configuring the CachingMetadataBasedIssuerNameRegistry can be done in code in global.asax:
void FederatedAuthentication_FederationConfigurationCreated(
    object sender, FederationConfigurationCreatedEventArgs e)
{
    var url = "https://localhost/sts/FederationMetadata/2007-06/FederationMetadata.xml";
    var cache = new FileBasedMetadataCache(@"c:\demos\cache.xml");
    e.FederationConfiguration.IdentityConfiguration.IssuerNameRegistry =
        new CachingMetadataBasedIssuerNameRegistry(new Uri(url), "sts",
                                                   cache, 30);
}
The CachingMetadataBasedIssuerNameRegistry will load the metadata the first time from the STS but then cache it via the IMetadataCache for the duration specified. Each time the application then starts the cache should be used. The cache will also be pre-populated asynchronously if the age is less than half the remaining time of the cache duration. In other words, if the cache duration is 30 days and there is 15 or fewer days before expiration then the CachingMetadataBasedIssuerNameRegistry will attempt to contact the STS, acquire the latest metadata and update the cache.
One last aspect of the CachingMetadataBasedIssuerNameRegistry is that the cache is encrypted and signed via the MachineKey APIs in ASP.NET. This can be disabled by setting the optional protect flag to false in config or via the constructor argument.
Server-side session token caching in WIF and Thinktecture IdentityModel
Once a user has been authenticated session tokens are emitted by the SAM as cookies. These session cookies are fairly large (given that they contain claims) and so it is desirable to optimize them to a smaller size (especially for browsers like Safari which have issues with large cookies).
In order to reduce session token size, WIF supports server-side session security token caching. I already discussed how to enable this feature here. Additionally, a CacheSessionsOnServer convenience function has been added to Thinktecture IdentityModel (which must be invoked from Init in global.asax). More on this API in a bit.
The default implementation of the server-side cache (provided by WIF) simply maintains the tokens in-memory on the web server and thus is a poor choice for production given the propensity for application domain recycles and the use of server farms. To then further address this issue, WIF supports custom server-side cache implementations by deriving from SessionSecurityTokenCache. Unfortunately this cache base class is meant for both passive scenarios (browser-based, WS-Federation) and active scenarios (programmatic, WS-Trust) and as such is slightly more complex than I’d like it to be.
If your application is only a browser-based application then instead of implementing the full-fledged WIF cache you can instead implement a cache derived from the PassiveRepositorySessionSecurityTokenCache base class provided in Thinktecture IdentityModel. It uses a combination of the built-in in-memory cache as well as a pluggable persistence layer to support longer-term and cross-machine caching (in a database or distributed in-memory cache, for example). This implementation is specifically focused on the web-based scenarios (as opposed to the WCF-based scenarios), thus the name Passive. To that end, there are some methods of the WIF session security token cache base class that are not implemented due to the lack of use for web-based scenarios.
The PassiveRepositorySessionSecurityTokenCache models token via the ITokenCacheRepository interface. The interface definition is:
public interface ITokenCacheRepository
{
    void AddOrUpdate(TokenCacheItem item);
    TokenCacheItem Get(string key);
    void Remove(string key);
    void RemoveAllBefore(DateTime date);
}

 public class TokenCacheItem
{
    [Key]
    public string Key { get; set; }
    public DateTime Expires { get; set; }
    public byte[] Token { get; set; }
}
TokenCacheItem has a string primary key, an expiration and the token itself (as a byte[]). The repository models adding or updating the cache item, getting a cache item, removing a cache item and removing stale cache items past a particular date.
There is no standard implementation of the token cache repository in IdentityModel. This implementation is left to the application developer. As an example, though, if you were to use entity framework as the repository then it might look like this:
public class EFTokenCacheDataContext : DbContext
{
    public EFTokenCacheDataContext()
        :base("name=TokenCache")
    {
    }

    public DbSet<TokenCacheItem> Tokens { get; set; }
}

public class EFTokenCacheRepository : ITokenCacheRepository
{
    public void AddOrUpdate(TokenCacheItem item)
    {
        using (EFTokenCacheDataContext db = new EFTokenCacheDataContext())
        {
            DbSet<TokenCacheItem> items = db.Set<TokenCacheItem>();
            var dbItem = items.Find(item.Key);
            if (dbItem == null)
            {
                dbItem = new TokenCacheItem();
                dbItem.Key = item.Key;
                items.Add(dbItem);
            }
            dbItem.Token = item.Token;
            dbItem.Expires = item.Expires;
            db.SaveChanges();
        }
    }

    public TokenCacheItem Get(string key)
    {
        using (EFTokenCacheDataContext db = new EFTokenCacheDataContext())
        {
            DbSet<TokenCacheItem> items = db.Set<TokenCacheItem>();
            return items.Find(key);
        }
    }

    public void Remove(string key)
    {
        using (EFTokenCacheDataContext db = new EFTokenCacheDataContext())
        {
            DbSet<TokenCacheItem> items = db.Set<TokenCacheItem>();
            var item = items.Find(key);
            if (item != null)
            {
                items.Remove(item);
                db.SaveChanges();
            }
        }
    }

    public void RemoveAllBefore(DateTime date)
    {
        using (EFTokenCacheDataContext db = new EFTokenCacheDataContext())
        {
            DbSet<TokenCacheItem> items = db.Set<TokenCacheItem>();
            var query =
                from item in items
                where item.Expires <= date
                select item;
            foreach (var item in query)
            {
                items.Remove(item);
            }
            db.SaveChanges();
        }
    }
}
Given the nature of the session security token cache in WIF, complex initialization can’t be performed in web.config. Instead configuration will need to be done programmatically. Configuring the PassiveRepositorySessionSecurityTokenCache can be done in code in global.asax:
protected void Application_Start()
{
    PassiveSessionConfiguration.ConfigureSessionCache(new EFTokenCacheRepository());
}
The prior configuration only configures which cache and repository to use on the server-side. It does not configure the SAM to use the smaller cookie format. To configure the smaller cookie format the IsReferenceMode flag must be set to true on the SAM. There is no web.config setting for this, so it needs to be set at runtime and has been provided via a helper called method in the IdentityModel library via the API CacheSessionsOnServer on the PassiveModuleConfiguration class. Unfortunately given the nature of the SAM as a http module this needs to be configured on each and every instance which is only possible from the Init method in global.asax, so this code will need to be added to the hosting application:
public override void Init()
{
    PassiveModuleConfiguration.CacheSessionsOnServer();
}
Init is invoked each time a http module is created and thus is where instance properties of the http modules can be modified.
I have a sample that uses EF as the backing store for the cache here.
Happy token caching. :)
Suppressing session token validation exceptions in WIF and Thinktecture IdentityModel
I’ve discussed in the past how to deal with session security token exceptions. Sometimes the token times out. Sometimes the token fails to validate. Sometimes the token’s not available in the server side cache. When these problems occur, there’s not much the application can do except treat the user as unauthenticated. So, the same technique used to suppress the yellow screen of death I illustrated in my past discussion has been added as a helper API in Thinktecture IdentityModel. To enable this feature, invoke SuppressSecurityTokenExceptions from Init in global.asax:
public override void Init()
{
    PassiveModuleConfiguration.SuppressSecurityTokenExceptions();
}
This API support two optional parameters — one for the relative path to redirect the user to when the token validation fails and another which is an Action<SecurityTokenException> callback to log the exception. For example:
public override void Init()
{
    PassiveModuleConfiguration.SuppressSecurityTokenExceptions(
        "~/Account/NotLoggedIn",
        ex => {
            File.AppendAllText("c:\logs\error.txt", ex.ToString();
        });
}
Note that File.AppendAllText is not thread-safe, but it illustrates the callback feature :)
HTH
The FAM (federated authentication module) can be configured to automatically redirect http requests to the STS for authentication when a user is unauthorized. This is a common setting and is configured with the passiveRedirectEnabled attribute in web.config as such:
<system.identityModel.services>
  <federationConfiguration>
    <cookieHandler requireSsl="true" />
    <wsFederation requireHttps="true"
                  passiveRedirectEnabled="true"
                  realm="http://localhost/rp"
                  issuer="https://localhost/sts/issue/wsfed"
        />
  </federationConfiguration>
</system.identityModel.services>
The above configuration will force all unauthorized requests to be redirected, but for active API clients like Ajax and WebAPI the redirect is not useful and the unauthorized status code of 401 is preferred. The FAM supports disabling the redirect with the AuthorizationFailed event and it could be handled like this in global.asax:
void WSFederationAuthenticationModule_AuthorizationFailed(
    object sender, AuthorizationFailedEventArgs e)
{
    e.RedirectToIdentityProvider = false;
}
The hard part about implementing the above event handler is to logic to determine which requests are browser requests (and should be redirected) and which requests are API requests (and should not be redirected). APIs calls can be detected by checking for either the “X-Requested-With” http header (for Ajax requests) or if the http handler being used on the server is the HttpControllerHandler class (which is used by WebAPI).
Fortunately this logic has been implemented for you in Thinktecture IdentityModel. This feature is enabled with a SuppressLoginRedirectsForApiCalls API which should be invoked from the Init method in global.asax:
public override void Init()
{
    PassiveModuleConfiguration.SuppressLoginRedirectsForApiCalls();
}
The redirect mentioned above will also be issued for other resource requests such as CSS and JavaScript files. If it is desirable to not redirect those requests, then the FAM http module can be configured to only run for requests that execute .NET code on the server (and not for static file requests). This is done by setting the preCondition attribute to “managed” for the FAM’s http module registration in web.config:
<system.webServer>
  <modules>
    <add name="WSFederationAuthenticationModule"
         type="System.IdentityModel.Services.WSFederationAuthenticationModule,
               System.IdentityModel.Services, Version=4.0.0.0, Culture=neutral,
               PublicKeyToken=b77a5c561934e089"
         preCondition="managed"
    />
  </modules>
</system.webServer>
HTH
Configuring machine key protection of session tokens in WIF and Thinktecture IdentityModel
Session tokens in WIF, by default, are protected with DPAPI which auto-generates a key that is specific to the machine. This means, by default, that session tokens won’t work in a web farm. Session tokens can be configured to use the ASP.NET <machineKey> for protection instead. This is achieved by using the MachineKeySessionSecurityTokenHandler as the session security token handler configured in web.config:
<system.identityModel>
  <identityConfiguration>

    <securityTokenHandlers>
      <remove type="System.IdentityModel.Tokens.SessionSecurityTokenHandler,
                    System.IdentityModel, Version=4.0.0.0, Culture=neutral,
                    PublicKeyToken=B77A5C561934E089" />

      <add
        type="System.IdentityModel.Services.Tokens.MachineKeySessionSecurityTokenHandler,
              System.IdentityModel.Services, Version=4.0.0.0, Culture=neutral,
              PublicKeyToken=B77A5C561934E089">
        <sessionTokenRequirement lifetime="00:30:00"></sessionTokenRequirement>
      </add>
    </securityTokenHandlers>

  </identityConfiguration>
</system.identityModel>
Notice this is configured similarly as described here when setting the session security token duration. Also notice that the MachineKeySessionSecurityTokenHandler supports the same configuration with the <sessionTokenRequirement> element and lifetime attribute.
Just as with the normal session security token handler, in Thinktecture IdentityModel a ConfigureMackineKeyProtectionForSessionTokens API was developed to allow this configuration be performed in code from Application_Start in global.asax:
protected void Application_Start()
{
    PassiveSessionConfiguration.ConfigureMackineKeyProtectionForSessionTokens();
}
This API will trigger the use of the machine key session security token handler and it will use the same session token lifetime as configured with the ConfigureDefaultSessionDuration API described here.
LearningLine
You might have heard already, but DevelopMentor (where I author and teach training courses in ASP.NET, MVC, jQuery, HTML5, WebAPI and WIF technologies) has released a new online training platform called LearningLine.
Michael has already done an excellent job of explaining the need for such an online training tool, so I won’t try to reproduce that. What I will add is that I will be authoring and teaching for LearningLine the same topics I have in the past for classroom training.
I’m excited about this new chapter in DevelopMentor’s history and I hope to see you in the online classroom!
Configuring persistent session token cookies in WIF with Thinktecture IdentityModel
WIF can be configured to issue persistent session cookies. This configuration can be performed in web.config:
<system.identityModel.services>
  <federationConfiguration>
    <wsFederation requireHttps="true"
                  passiveRedirectEnabled="true"
                  realm="http://localhost/rp"
                  issuer="https://localhost/sts/issue/wsfed"
                  persistentCookiesOnPassiveRedirects="true" />
  </federationConfiguration>
</system.identityModel.services>
The persistentCookiesOnPassiveRedirects attribute on the <wsFederation> element configures the session cookie issued by the SAM to be persistent for the lifetime of the token and so it is common to set both. A ConfigurePersistentSessions API was added to Thinktecture IdentityModel to make this configuration from code. It is a one-time configuration that is performed in Application_Start in global.asax:
protected void Application_Start()
{
    PassiveSessionConfiguration.ConfigurePersistentSessions(TimeSpan.FromDays(30));
}
This sets the persistent flag as well as the session token duration on the session security token.
Overriding WS-Federation token lifetime in Thinktecture IdentityModel
As I described earlier, you can configure the default session token lifetime. One detail I didn’t mention was that with the technique I illustrated you can only make the session lifetime shorter than the original token lifetime, but not longer. The point of this post is to show how you can make the session token lifetime longer than the token issued from a STS.
Once the FAM (federated authentication module) receives a token and then issues a session security token, it raises a SessionSecurityTokenCreated event. It is at this point where you can configure aspects of the token. Unfortunately the expiration isn’t something you can set, but you can designate a different session security token essentially replacing the the one created by the FAM. Here’s how (assuming the event handler in global.asax):
void WSFederationAuthenticationModule_SessionSecurityTokenCreated(object sender, SessionSecurityTokenCreatedEventArgs e)
{
    var handler = (SessionSecurityTokenHandler)FederatedAuthentication.FederationConfiguration.IdentityConfiguration.SecurityTokenHandlers[typeof(SessionSecurityToken)];
    var duration = handler.TokenLifetime;

    var token = e.SessionToken;
    e.SessionToken =
        new SessionSecurityToken(
            token.ClaimsPrincipal,
            token.Context,
            token.ValidFrom,
            token.ValidFrom.Add(duration))
        {
            IsPersistent = token.IsPersistent,
            IsReferenceMode = token.IsReferenceMode
        };
}
This code creates a new session security token (like described here) and it uses the duration as configured on the session security token handler (like described here). As with many of these behaviors, it’s not hard to configure in an application but it’s tedious. As such, this feature was added to the Thinktecture IdentityModel security library via the OverrideWSFedTokenLifetime API. It would typically be used in conjunction with setting the default session security token duration (like described here):
public override void Init()
{
    PassiveModuleConfiguration.OverrideWSFedTokenLifetime();
}
HTH
Sliding sessions in WIF with the session authentication module (SAM) and Thinktecture IdentityModel
Session lifetime with WIF’s SAM (session authentication module), by default, is fixed, meaning that the session ends when the token lifetime ends. The logic to determine the session duration (and how to change it) was mentioned here. There is no automatic support for sliding sessions in WIF but it’s possible by handling the SAM’s SessionSecurityTokenReceived event which, when handled in global.asax, typically looks like this:
void SessionAuthenticationModule_SessionSecurityTokenReceived(object sender, SessionSecurityTokenReceivedEventArgs e)
{
    SessionAuthenticationModule sam = FederatedAuthentication.SessionAuthenticationModule;

    var token = e.SessionToken;
    var duration = token.ValidTo.Subtract(token.ValidFrom);
    if (duration <= TimeSpan.Zero) return;

    var diff = token.ValidTo.Add(sam.FederationConfiguration.IdentityConfiguration.MaxClockSkew).Subtract(DateTime.UtcNow);
    if (diff <= TimeSpan.Zero) return;

    var halfWay = duration.TotalMinutes / 2;
    var timeLeft = diff.TotalMinutes;
    if (timeLeft <= halfWay)
    {
        e.ReissueCookie = true;
        e.SessionToken =
            new SessionSecurityToken(
                token.ClaimsPrincipal,
                token.Context,
                DateTime.UtcNow,
                DateTime.UtcNow.Add(duration))
            {
                IsPersistent = token.IsPersistent,
                IsReferenceMode = token.IsReferenceMode
            };
    }
}
The logic in this event handler will renew the session cookie if the duration remaining is less than half of the total session duration (much like forms authentication). For example, if the session duration is 30 minutes and the user has 15 minutes or less in the session, the session will be renewed. The above code, when issuing a new session security token, also honors some of the other details of session tokens including dealing with the allowable clock skew and preserving the prior token’s flags.
While it’s possible and fairly simply to include the above code in each of your projects if you’d like sliding session, it’s tedious. As such, this feature was added to the Thinktecture IdentityModel security library. It does need to be called from Init in global.asax, but it’s a one-liner:
public override void Init()
{
    PassiveModuleConfiguration.EnableSlidingSessionExpirations();
}
HTH
Configuring session token lifetime in WIF with the session authentication module (SAM) and Thinktecture IdentityModel
For browser-based (passive) applications when federating, session token lifetime in WIF (by default) is controlled by one of two factors: 1) original token lifetime from the STS, or 2) the configured session token lifetime for the RP (in the session security token handler). The resultant session token lifetime is the shorter of the two values. The configured session token lifetime for the RP is configurable in web.config:
<system.identityModel>
  <identityConfiguration>

    <securityTokenHandlers>
      <remove type="System.IdentityModel.Tokens.SessionSecurityTokenHandler,
                    System.IdentityModel, Version=4.0.0.0, Culture=neutral,
                    PublicKeyToken=B77A5C561934E089" />

      <add type="System.IdentityModel.Tokens.SessionSecurityTokenHandler,
                 System.IdentityModel, Version=4.0.0.0, Culture=neutral,
                 PublicKeyToken=B77A5C561934E089">
        <sessionTokenRequirement lifetime="00:30:00"></sessionTokenRequirement>
      </add>

  </identityConfiguration>
</system.identityModel>
Notice the approach involves un-registering the session security token handler and then re-registering it with a <sessionTokenRequirement> element with a lifetime attribute. While this approach is possible, it’s tedious, so in Thinktecture IdentityModel there is now a ConfigureDefaultSessionDuration API on the PassiveSessionConfiguration class to allow this configuration from code:
protected void Application_Start()
{
    var duration = TimeSpan.FromMinutes(30);
    PassiveSessionConfiguration.ConfigureDefaultSessionDuration(duration);
}
The code based approach is slightly more convenient, with the tradeoff that the duration is embedded in the code.
WIF session helper APIs for browser-based (passive) applications in Thinktecture IdentityModel
Recently I added several convenience APIs to Thinktecture.IdentityModel. The goal of the helper methods is to provide simple and standard implementations for behaviors that you might want in your WIF-enabled ASP.NET application. Some of these behaviors could be configured in web.config, but some others cannot and require code. In both cases, the APIs provide a simple mechanism to enable the various behaviors.
This post will serve as the starting documentation for these APIs and I will provide a post per behavior. I will update the links here as the posts become available. Here is the list of behaviors the APIs enable:
- Sliding sessions
- Configuring session token lifetime
- Overriding WS-Federation token lifetime
- Configuring persistent session token cookies
- Server-side session token caching
- Configuring machine key protection of session tokens
- Suppressing session token validation exceptions
- Suppress login redirects for API clients (e.g., WebAPI and Ajax)
- Dynamic issuer name registry direct from STS federation metadata
The APIs are broken down into two classes based upon when the configuration needs to be set to enable the behavior:
- PassiveSessionConfiguration is for one-time configuration that can be set in Application_Start in global.asax, and
- PassiveModuleConfiguration is per-module configuration that needs to be set in Init in global.asax (which I discussed here).
I plan to update the 4.0 version of IdentityModel with the same APIs in the coming weeks.
Beware setting properties or registering events on the SAM and FAM
In WIF some settings or behaviors that you’d want for your application can’t be set in config. Instead these settings or behaviors need to be invoked by either setting properties or handling events on the SAM (SessionAuthenticationModule) or FAM (WSFederationAuthenticationModule). One example is enabling server-side caching of session tokens. This is done by setting the IsReferenceMode property on the SAM:
var sam = FederatedAuthentication.SessionAuthenticationModule;
sam.IsReferenceMode = true;
It seems like you’d simply want to set this globally at application start-up in Application_Start in global.asax, but unfortunately that’s not the right way to do this. The problem with this approach (and this design in WIF) is that in ASP.NET many instances of http modules are created — one for each thread processing http requests in the thread pool. This means we need to set any properties or register for any events per-instance. This then raises the question — where can we do this?
Fortunately in ASP.NET, the Init virtual method is invoked on the application class (meaning, the code you write in global.asax) each time the HttpApplication is created with all of its associated http modules. Here’s the correct place to put the code from above:
protected void Application_Start()
{
    ...
}

public override void Init()
{
    var sam = FederatedAuthentication.SessionAuthenticationModule;
    sam.IsReferenceMode = true;
}
HTH
Beware WIF Session Authentication Module (SAM) redirects and WebAPI services in the same application
It is very common to want to build a browser based app in the same project as a WebAPI endpoint. If you’re also using claims and WIF (and thus the SAM) then there’s a subtle problem you should look out for.
When HTTP requests are made into an application using WIF then the SAM intercepts each one of these to look for the incoming session token for authentication. If the cookie’s there, then no worries, but if the cookie is not present then the SAM does an interesting thing — it essentially checks the incoming URL against the URL for the application as it’s configured in the host (meaning IIS) and it performs a case-sensitive comparison. If that comparison fails then it redirects the user to the correct cased URL. You can see the code here:
 if (!this.TryReadSessionTokenFromCookie(out sessionToken) &&
     string.Equals(request.HttpMethod, "GET", StringComparison.OrdinalIgnoreCase))
    {
        string absoluteUri = request.Url.AbsoluteUri;
        string y = MatchCookiePath(absoluteUri);
        if (!StringComparer.Ordinal.Equals(absoluteUri, y))
        {
            application.Response.Redirect(y, false);
            application.CompleteRequest();
        }
    }
I suppose this makes sense since URLs are case sensitive and thus the intent is to redirect the user’s browser to the correct cased URL so that the cookies will be sent in correctly.
This behavior causes a problem for API-based clients. If they issue a HTTP request and have the casing on the URL wrong then they get a redirect response rather than being dispatched to the expected handler in the server. Normally this wouldn’t be an issue since the redirect is back into the same URL originally requested (with the casing corrected). The problem is that the redirect will not necessarily retransmit HTTP headers sent on the original request. I ran into this problem because I was writing a C# WebAPI client using HttpClient class. It was sending an Authorization header and the automatic redirect was dropping the header and thus the call became unauthenticated. It made for a very frustrating hour of debugging.
So if you have an API client making HTTP calls into a claims-enabled application and headers you are sending aren’t being seen by the server, then this might be your problem. The moral of the story is that URLs are case sensitive which is often forgotten.
This is post 3 in a short 3 part series on describing the database support in v2 of Thinktecture.IdentityServer. The parts of this series are:
- Database support in Thinktecture IdentityServer.
- EF migrations in Thinktecture IdentityServer.
- Integrating Thinktecture IdentityServer database with an existing database (this post).
With the default configuration, the database that contains the configuration information for IdentityServer is its own separate database. It’s understandable that you might want that configuration database to be merged with an existing database. This post provides an approach to solving this requirement.
If you are not using EF code first already for the existing database, then there’s little to do other than to create the schema needed for IdentityServer. This can be done with the migrations discussed in the last post. But if you are using an existing DbContext class and want to merge the IdentityServer schema into the same database then you will run into the “The model backing the ‘IdentityServerConfigurationContext’ context has changed since the database was created. Consider using Code First Migrations to update the database” error. The problem is that the two different DbContext classes want to “own” the schema and so the solution is to merge them.
To get started in understanding the solution, it’s helpful to inspect the code that revolves around the IdentityServer DbContext class, which is IdentityServerConfigurationContext. If you open the solution and locate the “Repositories” project and then open IdentityServerConfigurationContext.cs you will see the class. This is the gist of it:
public class IdentityServerConfigurationContext : DbContext
{
    public DbSet<GlobalConfiguration> GlobalConfiguration { get; set; }
    public DbSet<WSFederationConfiguration> WSFederation { get; set; }
    public DbSet<KeyMaterialConfiguration> Keys { get; set; }
    public DbSet<WSTrustConfiguration> WSTrust { get; set; }
    public DbSet<FederationMetadataConfiguration> FederationMetadata { get; set; }
    public DbSet<OAuth2Configuration> OAuth2 { get; set; }
    public DbSet<SimpleHttpConfiguration> SimpleHttp { get; set; }
    public DbSet<DiagnosticsConfiguration> Diagnostics { get; set; }

    public DbSet<ClientCertificates> ClientCertificates { get; set; }
    public DbSet<Delegation> Delegation { get; set; }
    public DbSet<RelyingParties> RelyingParties { get; set; }
    public DbSet<IdentityProvider> IdentityProviders { get; set; }
    public DbSet<Client> Clients { get; set; }

    public static Func<IdentityServerConfigurationContext> FactoryMethod { get; set; }

    public IdentityServerConfigurationContext()
        : base("name=IdentityServerConfiguration")
    { }

    public static IdentityServerConfigurationContext Get()
    {
        if (FactoryMethod != null) return FactoryMethod();

        return new IdentityServerConfigurationContext();
    }
}
So there are some 13 tables that contain various configuration information. The rest of IdentityServer then uses the repository pattern on these tables to provides access to the rest of the engine. The repositories locate the IdentityServerConfigurationContext via the Get method from the code snippet above.
Given the number of tables and static dependency on this class from within IdentityServer and its Get method, there are two approaches that come to mind to integrate IdentityServer’s DbContext with another DbContext class:
- Merge the other DbContext‘s tables into IdentityServer’s DbContext, or
- Extend IdentityServer’s DbContext class and put the new tables into the derived class
For the first suggestion this would entail using IdentityServerConfigurationContext as your primary DbContext and then the rest of your other code would use whatever approach desired to instantiate IdentityServerConfigurationContext for use at runtime. This approach means changing the code in IdentityServer and thus is brittle when there are future updates.
The second suggestion requires no code changes to IdentityServer and thus is the most adaptive when new changes are released. The trick with this approach is that IdentityServerConfigurationContext provides a factory API to create the context (notice the FactoryMethod property above). I’ll illustrate how to implement this approach.
The first step is to create a new context that inherits IdentityServerConfigurationContext and inside define any additional tables needed:
public class CustomContext : IdentityServerConfigurationContext
{
    public DbSet<SomeEntityClass> SomeTable { get; set; }
}
Next in global.asax we need to register the custom context with IdentityServer’s factory delegate and change the database initializer for the custom context:
protected void Application_Start()
{
    IdentityServerConfigurationContext.FactoryMethod = delegate()
    {
        return new CustomContext();
    };

    Database.SetInitializer<CustomContext>(new ConfigurationDatabaseInitializer());
    // this was the old one, so we can comment it our (or remove it)
    //Database.SetInitializer(new ConfigurationDatabaseInitializer());

   ...
}
And that’s it. Anytime IdentityServer needs an IdentityServerConfigurationContext it will be using your derived implementation with its additional tables.
HTH
Database migrations in Thinktecture.IdentityServer
This is post 2 in a short 3 part series on describing the database support in v2 of Thinktecture.IdentityServer. The parts of this series are:
- Database support in Thinktecture IdentityServer.
- EF migrations in Thinktecture IdentityServer (this post).
- Integrating Thinktecture IdentityServer database with an existing database.
In IdentityServer we use EF as the data access technology. Since we anticipate the possibility of database schema changes in the future, we’ve also then started using EF’s code first migrations feature to try to provide a smooth upgrade path for anyone that needs to upgrade to future versions.
As I pointed out in the previous post, we also support any EF compatible database. The unfortunate aspect of this is that code first migrations are database/provider specific. So this means we need a migration for each possible database that would be used. This is unfortunate and tedious for us since we don’t know all of the database providers that might be used, but we made some safe assumptions that SqlCe 4.0 and SqlServer would be the main ones so those are the migrations we have checked into the source code repository. We’re assuming/hoping that AzureSql will be compatible with SqlServer and thus don’t have a specific one for SqlAzure. If SqlAzure is in fact different than SqlServer or if you have other database providers then we’d be happy for you to contribute those migrations.
To see the migrations you will need to open the solution and navigate to the “Repositories” project. It contains directories for the two supported database providers (SqlCe and SqlServer). Checked in is the actual code migration (.cs file) and also the equivalent SQL (.sql file). This way you can run the migration either from within Visual Studio or you can use the SQL file and run it directly against your database.

To run the migration from Visual Studio you need to run the package manager console by choosing the menu from Tools –> Library Package Manager –> Package Manage Console.

And this is what the console window looks like. You’ll need to pick the “Repository” project as the Default Project (notice the drop-down in the top right corner of the window):
When you run commands since we have different database providers we’ll need to specify which one we want to use. This is why the connection strings configuration in the WebSite project has multiple entries (~/Configuration/connectionStrings.config):
<connectionStrings>
  <!-- configuration data like endpoints, protocol config, relying parties etc... -->
  <add name="IdentityServerConfiguration"
       connectionString="server=localhost;database=IdentityServerConfiguration;trusted_connection=yes;"
       providerName="System.Data.SqlClient" />

  <add name="SqlServer"
       connectionString="server=localhost;database=IdentityServerConfiguration;trusted_connection=yes;"
       providerName="System.Data.SqlClient" />
  <add name="SqlCe"
       connectionString="Data Source=|DataDirectory|\IdentityServerConfiguration.sdf"
       providerName="System.Data.SqlServerCe.4.0" />
</connectionStrings>
The IdentityServerConfiguration entry is for runtime and the SqlServer and SqlCe entries are for running migrations from within the package manager console.
Once the console is up and you know which database you’d like to configure, you can then create and/or upgrade it to a particular migration (which usually would be the latest one). To do so run the command:
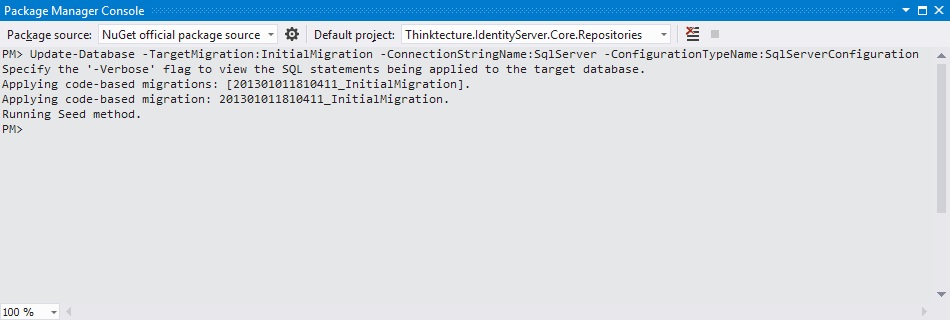
Update-Database -TargetMigration:InitialMigration -ConnectionStringName:SqlServer -ConfigurationTypeName:SqlServerConfiguration
TargetMigration indicates the name of the migration (which is the class name inside the .cs migration file). ConnectionStringName is which connection and database provider to use from the .config file. ConfigurationTypeName is which migration to use (SqlCeConfiguration or SqlServerConfiguration). You should get output like this:
You could use the code first approach for auto-creating the database, but using the migrations is the preferred way of creating and managing the database for IdentityServer, mainly because the migrations allow more control over the schema (including indexes, etc.).
HTH
Database support in Thinktecture IdentityServer
This is post 1 in a short 3 part series on describing the database support in v2 of Thinktecture.IdentityServer. The parts of this series are:
- Database support in Thinktecture IdentityServer (this post).
- EF migrations in Thinktecture IdentityServer.
- Integrating Thinktecture IdentityServer database with an existing database.
In v2 of IdentityServer we used EntityFramework (EF) CodeFirst as our data access framework. What this means is that if your database supports EF then you can use it with IdentityServer.
In the default configuration of the code, we’ve configured the application to use a SqlServerCompact 4.0 database so that it’s dirt simple to download the code and get started. This database configuration is done via the ~/configuration/connectionStrings.config and it puts the database in ~/App_Data/IdentityServerConfiguration.sdf:
<connectionStrings>
  <add name="IdentityServerConfiguration"
    connectionString="Data Source=|DataDirectory|\IdentityServerConfiguration.sdf"
    providerName="System.Data.SqlServerCe.4.0" />
</connectionStrings>
There are other connection strings in this file (name=”SqlServer” and name=”SqlCe”), but they’re there for my convenience when doing database migrations (which I’ll comment on in the next post). If you’d like to remove them you can — they’re not used in any way at runtime.
So, if you’d like to use another database other than SqlServerCompact, then it’s just a matter of changing the connection string and provider name. This is all you’d need to do:
<connectionStrings>
  <add name="IdentityServerConfiguration"
    connectionString="server=localhost;database=IdentityServerConfiguration;trusted_connection=yes;"
    providerName="System.Data.SqlClient" />
</connectionStrings>
These connection strings I’ve shown do far are only for the IdentityServer configuration database and are separate from the user account database. If you’re using the membership provider for the account store then that will be configured separately as any other another other membership provider would be configured.
HTH
Replacing forms authentication with WIF’s session authentication module (SAM) to enable claims aware identity
Forms authentication was great. For like 10 years it was great. But it’s time for us to move on…
The main issue with Forms authentication is that the forms auth cookie was primarily only designed to keep the user’s username and no additional data (despite the UserData property and the unfortunate lack of APIs to assist populating it and managing the ticket and cookie). So to augment the username with roles or additional identity data (typically from the database) we would use the PostAuthenticateRequest event in ASP.NET/IIS (as discussed here and here). The main issue with PostAuthenticateRequest is the additional round trip to the database on each request into the web server. Caching can help mitigate this, of course, but you have to explicitly do the caching.
Now that .NET 4.5 is claims-aware, I’d submit that using forms authentication is antiquated. Dominick already posted on this a while ago, but I wanted to show what’s involved from a more introductory perspective. I’d suggest reading Dom’s post for more motivation. I’ll show here how to use the SAM directly.
This is what traditional login code could would look like with Forms authentication:
[HttpPost]
[ValidateAntiForgeryToken]
public ActionResult Login(string username, string password)
{
    if (DoDatabaseCheckToValidateCredentials(username, password))
    {
        // set username in cookie, false issues non-persistent cookie
        FormsAuthentication.SetAuthCookie(username, false);
        return RedirectToAction("Index", "Home");
    }
    else
    {
        ModelState.AddModelError("", "Invalid username or password.");
    }
    return View();
}
This would simply log the user in. We’d then have to load their roles or claims on each and every request as such in global.asax:
void Application_PostAuthenticateRequest(object sender, EventArgs e)
{
    var ctx = HttpContext.Current;
    if (ctx.Request.IsAuthenticated)
    {
        string[] roles = LookupRolesForUser(ctx.User.Identity.Name);
        var newUser = new GenericPrincipal(ctx.User.Identity, roles);
        ctx.User = Thread.CurrentPrincipal = newUser;
    }
}
So with WIF 4.5 they have a different http module that will do what the forms authentication http module does, but it’s claims aware. This means it allows you to assign claims (and thus roles) at login time. This identity information is cached in the cookie and therefore you won’t have to re-query the database upon each subsequent request. Here’s the code:
[HttpPost]
[ValidateAntiForgeryToken]
public ActionResult Login(string username, string password)
{
    if (DoDatabaseCheckToValidateCredentials(username, password))
    {
        Claim[] claims = LoadClaimsForUser(username);
        var id = new ClaimsIdentity(claims, "Forms");
        var cp = new ClaimsPrincipal(id);

        var token = new SessionSecurityToken(cp);
        var sam = FederatedAuthentication.SessionAuthenticationModule;
        sam.WriteSessionTokenToCookie(token);

        return RedirectToAction("Index", "Home");
    }
    else
    {
        ModelState.AddModelError("", "Invalid username or password.");
    }

    return View();
}
So as you can see, we do the same check against the database to validate the credentials. We then query the database for the identity information about the user and this is returned as an array of Claim objects. We then create a identity and principal from the claims and then create the token and write it to the response. On subsequent requests the cookie will be read and populate our user object.
A few details to fill in. Here’s what the code to create the claims might look like:
const string OfficeLocationClaimType = "https://brockallen.com/claims/officelocation";

private Claim[] LoadClaimsForUser(string username)
{
    var claims = new Claim[]
    {
        new Claim(ClaimTypes.Name, username),
        new Claim(ClaimTypes.Email, "username@company.com"),
        new Claim(ClaimTypes.Role, "RoleA"),
        new Claim(ClaimTypes.Role, "RoleB"),
        new Claim(OfficeLocationClaimType, "5W-A1"),
    };
    return claims;
}
The idea is that you can create any claims you’d want to model the user’s identity for you application (including custom claims like the last one in the list). To access the claims on subsequent requests, you’d use the old non-claims aware APIs or the new claims-aware APIs (both work against the same identity information):
void DoSomeStuff()
{
    // old style role check
    if (User.IsInRole("RoleA"))
    {
        // old style username check
        var name = User.IsInRole.Name;

        // new style claim check for the email claim
        var email = ClaimsPrincipal.Current.FindFirst(ClaimTypes.Email).Value;

        // use the identity information
        SendUserEmail(name, email);
    }
}
The only last thing to mention is the configuration needed to do all of the above. First your project will need references to System.IdentityModel and System.IdentityModel.Services. And then you’ll need to add some <configSections> to web.config. And lastly you’ll need to add the SAM (session authentication module) to the http modules list:
  <configSections>
    <section name="system.identityModel" type="System.IdentityModel.Configuration.SystemIdentityModelSection, System.IdentityModel, Version=4.0.0.0, Culture=neutral, PublicKeyToken=B77A5C561934E089" />
    <section name="system.identityModel.services" type="System.IdentityModel.Services.Configuration.SystemIdentityModelServicesSection, System.IdentityModel.Services, Version=4.0.0.0, Culture=neutral, PublicKeyToken=B77A5C561934E089" />
  </configSections>
  <system.webServer>
    <modules>
      <add name="SessionAuthenticationModule"
            type="System.IdentityModel.Services.SessionAuthenticationModule, System.IdentityModel.Services, Version=4.0.0.0, Culture=neutral, PublicKeyToken=b77a5c561934e089" />
    </modules>
  </system.webServer>
And there we have it. Happy modern authentication!
Adding custom roles to windows roles in ASP.NET using claims
If you’ve been using WIF (Windows Identity Foundation) for any amount of time this shouldn’t be anything new, but for folks that haven’t had their eyes opened yet to using claims-based identity then I wanted to show how it’s very easy to add custom roles to windows roles (or any other claim type for that matter).
Here’s the requirement: I’m using windows authentication and I get all the groups back for the user as roles, but I want to also add additional application specific roles to the user for authorization purposes.
First thing to note here is that if you’re using windows authentication then you don’t need to use the WindowsTokenRoleProvider since the user’s groups are already loaded via windows authentication and most of the methods in this class throw an exception letting you know they’re not implemented (thus illustrating that role providers aren’t all that useful).
Second, if you’re using .NET 4.5 (since all the identity classes are claims-aware) then it’s dirt simple to augment them with custom claims (including roles). In ASP.NET you’d need to hook the same event in the HTTP pipeline that you’d hook for custom roles (as I already pointed out here). In short you need to load your custom roles (or claims) from your custom store/database and then augment the current principal with them in the Application_PostAuthenticateRequest in global.asax. Here’s the code:
void Application_PostAuthenticateRequest()
{
    if (Request.IsAuthenticated)
    {
        string[] roles = GetRolesForUser(User.Identity.Name);
        var id = ClaimsPrincipal.Current.Identities.First();
        foreach (var role in roles)
        {
            id.Claims.Add(new Claim(ClaimTypes.Role, role));
        }
    }
}
HTH
DevWeek 2013
I’ll be speaking at DevWeek 2013 the week of March 4th in London, UK. My sessions are:
- Day-long pre-conference session: A day of jQuery and jQuery Mobile
- Async ASP.NET
- Internals of security in ASP.NET
- Mobile development with MVC 4 and jQuery Mobile
- Day-long post-conference session: A day of identity and access control for .NET 4.5 (co-speaking with Dominick)
Hope to see you there.
CORS and Windows Authentication
If you want to use windows authentication with CORS then a few things need to be configured properly.
First on the server in your CORS configuration you will need to allow credentials, which means emitting the Access-Control-Allow-Credentials=true response header from both preflight and simple CORS requests. If you’re using the CORS feature of the ThinkTecture.IdentityModel security library then all you’d need to do use the AllowCookies() option (I am thinking of renaming it to AllowCookiesAndCredentials() to be more descriptive).
Then in your client code (I’m assuming jQuery here) if you wish to support integrated windows authentication you simply need to tell jQuery (and consequently the XMLHttpRequest) that it is allowed to perform the authorization handshake (via the withCredentials flag):
$.ajax({
    url: url,
    type: "GET",
    data : {...},
    ...
    xhrFields: {
        withCredentials: true
    }
});
or if you’d prefer to do basic authentication and have the username and password to pass, you can do this:
$.ajax({
    url: url,
    type: "GET",
    data : {...},
    ...
    username: "username",
    password:"password",
    xhrFields: {
        withCredentials: true
    }
});
HTH
OAuth2 in Thinktecture IdentityServer : OAuth2 identity providers
One of the new features in Thinktecture IdentityServer v2 is the support for federation with other identity providers. This means that IdentityServer can act as a federation gateway (sometimes called a R-STS or resource-STS) and Dominick shows off the feature here. In his video Dominick mentions that only other WS-Federation identity providers are supported, but this is no longer correct! OAuth2 identity providers are now supported. This means that IdentityServer can act as a federation gateway for Facebook, Live and/or Google (and potentially other OAuth2 providers in the future).
To get this working it’s not too much different than a normal R-STS setup that Dominick covers in his video. The only difference is that when you configure an identity provider by choosing “new”:

You get the standard screen to create a new identity provider (WS-* or OAuth2):

You then have the option of indicating that the identity provider is an OAuth2 style provider:

You’d then choose which of the supported OAuth2 providers from the list:

And then enter the typical OAuth2 client ID and client secret values:

And once all the information is filled in, a normal WS-Federation client can connect to IdentityServer.

And then you get claims back to the client:

So we now have federation with OAuth2 identity providers. Yay!
Integrating Claims and OAuth2
I just created a sample library that illustrates how Claims can be easily integrated when using OAuth2 identity providers for authentication. I created the OAuth2 library from scratch (it was quite straightforward). In this library I wanted to hide as much of the OAuth2 protocol and claims mapping as possible so that a consuming application would just have to say which OAuth2 provider to use and what page/URL to return the user to once all the login and claims magic has happened.
Is very easy to use from MVC (these client IDs and secrets are throw-away):
static void RegisterOAuth2Clients()
{
    OAuth2Client.Instance.RegisterProvider(
        ProviderType.Google,
        "421418234584-3n8ub7gn7gt0naghh6sqeu7l7l45te1c.apps.googleusercontent.com",
        "KDJt_7Rm6Or2pJulBdy0gvpx");

    OAuth2Client.Instance.RegisterProvider(
        ProviderType.Facebook,
        "195156077252380",
        "39b565fd85265c56010555f670573e28");

    OAuth2Client.Instance.RegisterProvider(
        ProviderType.Live,
        "00000000400DF045",
        "4L08bE3WM8Ra4rRNMv3N--un5YOBr4gx");
}
Here’s my view to give the user a choice as to which provider to use:
<h2>Login With:</h2>
<ul>
  <li>@Html.ActionLink("Google", "Login", new {type = ProviderType.Google})</li>
  <li>@Html.ActionLink("Live", "Login", new {type = ProviderType.Live})</li>
  <li>@Html.ActionLink("Facebook", "Login", new {type = ProviderType.Facebook})</li>
</ul>
And then you just have a Login action method to choose the OAuth2 provider you want to use:
public ActionResult Login(ProviderType type)
{
    // 1st param is which OAuth2 provider to use
    // 2nd param is what URL to send the user once all the login magic is done
    return new OAuth2ActionResult(type, Url.Action("Index"));
}
And that’s it. Once the login has happened claims are available via ClaimsPrincipal.Current.Claims (which is where they normally are).
If you’re familiar with using OAuth2 you’re used to seeing a authorization code callback endpoint. This is a detail of the protocol I wanted to encapsulate so that the consuming application didn’t have to “deal” with that. To hide this I use an AreaRegistration internally in the library to define the callback endpoint. In this area when the OAuth2 callback arrives with the authorization code, the library continues the protocol to exchange the code for a token and then uses that token to obtain the profile information for the user. Once that profile data is acquired, it is converted into claims. Then the WIF Session Authentication Module (SAM) is used to log the user in. We then redirect back to the URL indicated in the OAuth2ActionResult above. Magic!
Code is up on GitHub. Library is up on NuGet. Feedback is welcome.
Dealing with session token exceptions with WIF in ASP.NET
When doing WIF programming in ASP.NET you will sometimes come across this exception:
“ID4243: Could not create a SecurityToken. A token was not found in the token cache and no cookie was found in the context.”
This exception is thrown when the browser is sending a cookie that contains the user’s claims but something about the processing can’t be performed (either the key has changed so the token can’t be validated or if using a server side cache and the cache is empty). An end user isn’t going to be able to do much about this and they’re going to continue to get the error since the browser will keep sending the cookie.
The easy solution to the problem is to add this snippet to the OnError event in global.asax:
void Application_OnError()
{
    var ex = Context.Error;
    if (ex is SecurityTokenException)
    {
        Context.ClearError();
        if (FederatedAuthentication.SessionAuthenticationModule != null)
        {
            FederatedAuthentication.SessionAuthenticationModule.SignOut();
        }
        Response.Redirect("~/");
    }
}
This detects the token exception and clears the cookie. You could also add logging and have other logic about where to redirect the user (perhaps back to a login page if desired).
HTH
Demos – Boston Code Camp 18
Here are the slides and demos for my two talks today at Boston Code Camp 18: http://sdrv.ms/T7Mbgc
Also here are some links I mentioned during my talks:
- Training from DevelopMentor
- ADFS (Active Directory based Identity Provider/STS)
- Azure ACS (cloud based R-STS)
- Thinktecture IdentityServer (open source Identity Provider/STS)
- Thinktecture.IdentityModel (security helper library)
- My post on why session state is bad
- My post on using the MachineKey API to protect values sent back to users
Thanks for attending and thanks to the organizers of Code Camp!
Password management made easy in ASP.NET with the Crypto API
If you are building your own database of credentials then you need to store passwords. I won’t go into the details of why (but you can read them here), but the modern way of doing it is with password stretching (or iterative hashing) using the Rfc2898DeriveBytes class. This class generates a salt and then uses that to hash the password but instead of once it does it in a loop for a certain number of iterations (1000 or 10000 or whatever). This is a stronger way to store passwords compared to a single hash because it slows an attacker down if they are trying to generate a rainbow table to brute force the hashed password. If you’ve never used this class before then it can be a little confusing. Fortunately in ASP.NET (via the Crypto class in System.Web.Helpers.dll) they provide a wrapper on this and so you don’t even have to get involved with the details. Here’s how you would use this when creating a new account for a user using Crypto.HashPassword:
public void CreateAccount(string username, string password)
{
    var hashedPassword = Crypto.HashPassword(password);
    CreateAccountInDatabase(username, hashedPassword);
}
The beauty here is that the returned value contains both the salt and the hashed password in a single value. All you need to do is store the username and hashed password in your database.
Another consideration when doing your own password management has to do when you are validating credentials on a login page. Of course we’ll need to re-run the hashing algorithm to validate a password provided by the user. We then compare the hashed password from the user to the hashed password stored in the database.The work is also provided by the Crypto class via Crypto.VerifyHashedPassword:
public bool ValidateCredentials(string username, string password)
{
    var hashedPassword = GetPasswordFromDatabase(username);
    var doesPasswordMatch = Crypto.VerifyHashedPassword(hashedPassword, password);
    return doesPasswordMatch;
}
One subtle issue that’s not obvious here is that we don’t want to use the normal string comparison (== operator) when comparing password values. The reason is that normal string comparison will exit as soon as the first character mismatch is encountered and this can leak information to an attacker. Fortunately the implementation inside of Crypto.VerifyHashedPassword does not use the normal string comparison and always does a full character-by-character comparison to not leak this side channel information. It’s really done quite well.
So if you’re not using the membership provider then you need to manage passwords, and this can be done easily and securely with the Crypto class. Kudos to Microsoft for this API.
CORS, IIS and WebDAV
The most common problem encountered when trying to get CORS working in IIS is WebDAV. WebDAV is installed as both a module and a handler. It wants to process OPTIONS requests but doesn’t know what to do for CORS (especially if you’re using the CORS support from Thinktecture.IdentityModel). The fix is to remove both the module and handler in web.config.
The other common problem when using the CORS support from Thnktecture.IdentityModel is that the handler for .NET code (the ExtensionlessUrlHandler) by default only allows GET, POST, HEAD and DEBUG methods. We want it to also process OPTIONS, so this needs to be configured. Fortunately in the MVC 4 templates this is configured automatically, but if you’re doing something other than MVC 4 then you will have to configure it yourself.
Here’s what your web.config should look like to disable WebDAV and allow OPTIONS for the ExtensionlessUrlHandler:
<system.webServer>
    <modules runAllManagedModulesForAllRequests="true">
      <remove name="WebDAVModule" />
    </modules>
    <handlers>
      <remove name="WebDAV" />
      <remove name="ExtensionlessUrlHandler-ISAPI-4.0_32bit" />
      <remove name="ExtensionlessUrlHandler-ISAPI-4.0_64bit" />
      <remove name="ExtensionlessUrlHandler-Integrated-4.0" />
      <add name="ExtensionlessUrlHandler-ISAPI-4.0_32bit" path="*." verb="GET,HEAD,POST,DEBUG,PUT,DELETE,PATCH,OPTIONS" modules="IsapiModule" scriptProcessor="%windir%\Microsoft.NET\Framework\v4.0.30319\aspnet_isapi.dll" preCondition="classicMode,runtimeVersionv4.0,bitness32" responseBufferLimit="0" />
      <add name="ExtensionlessUrlHandler-ISAPI-4.0_64bit" path="*." verb="GET,HEAD,POST,DEBUG,PUT,DELETE,PATCH,OPTIONS" modules="IsapiModule" scriptProcessor="%windir%\Microsoft.NET\Framework64\v4.0.30319\aspnet_isapi.dll" preCondition="classicMode,runtimeVersionv4.0,bitness64" responseBufferLimit="0" />
      <add name="ExtensionlessUrlHandler-Integrated-4.0" path="*." verb="GET,HEAD,POST,DEBUG,PUT,DELETE,PATCH,OPTIONS" type="System.Web.Handlers.TransferRequestHandler" preCondition="integratedMode,runtimeVersionv4.0" />
    </handlers>
  </system.webServer>
HTH
Here are the slides and demos from my talk: http://sdrv.ms/RRtx9p
Here are links for some of the topics I mentioned during my talk:
- Training from DevelopMentor
- ADFS (Active Directory based Identity Provider/STS)
- Thinktecture IdentityServer (open source Identity Provider/STS)
- Identity and Access extension for VS2012 (thx John)
- My post on why session state is bad
- My post on integrating claims with the new social media authentication feature in ASP.NET 4.5
- CSRF (cross site request forgery)
I honestly had no idea I presented though a earthquake (though that is the second time I’ve done that now)… anyway, thanks for coming!
Boston Code Camp 18
I’ll be speaking at Boston Code Camp 18 on October 20th, 2012 at the Microsoft New England Research & Development Center in Cambridge, MA. My two talks are:
Hope to see you there.
Microsoft DevBoston : Windows Identity Foundation in .NET 4.5
I’ll be speaking on Tuesday, October 16, 2012 at the Microsoft DevBoston user group. The topic will be “Introduction to Windows Identity Foundation in .NET 4.5”. The meeting will be hosted at the Microsoft NERD center in Cambridge, MA.
Integrating Claims and OAuthWebSecurity
As I mentioned yesterday, I have been researching the new OAuth/OpenID support in ASP.NET. One of the interesting aspects of using an external identity provider is that it not only authenticates users but also can provide additional user data (such as email, gender, location, etc.). The one thing I was surprised about is that the project templates don’t take advantage of this data (or at least it’s not pointed out in any way). So I wanted to illustrate how to make this data readily available to an application.
This additional user data is available in the ExternalLoginCallback action method in the AuthenticationResult object returned from the call to OAuthWebSecurity.VerifyAuthentication:
[AllowAnonymous]
public ActionResult ExternalLoginCallback(string returnUrl)
{
    AuthenticationResult result = OAuthWebSecurity.VerifyAuthentication(Url.Action("ExternalLoginCallback", new { ReturnUrl = returnUrl }));
    if (!result.IsSuccessful)
    {
        return RedirectToAction("ExternalLoginFailure");
    }

    IDictionary<string, string> userData = result.ExtraData;

    ...
}
So the next question becomes “what to do with this data”. One idea would be to simply save it to the database and then retrieve it as needed. This would work and would also be useful for offline access to the data (like sending emails). But I wanted a more general purpose mechanism to make this data available to the application. Of course the first thing that came to mind was to use Claims.
Now that WIF and Claims are baked into the .NET framework in 4.5, this is an obvious place to express this user data to the rest of the application. In fact, I am a little surprised there’s nothing built-in that already does this. Since there wasn’t anything built-in, I built my own little framework to map the AuthenticationResult.ExtraData into the ClaimsPrincipal.Current.Claims collection. Since the new SimpleMembership is just using Forms Authentication and since the FormsIdentity now inherits from ClaimsIdentity I was able to add this in with minimal disruption.
I created a helper library called WebSecurityClaimsHelper with a class called OAuthClaims that maps this AuthenticationResult into claims for the current user. I’ve packed it into a NuGet package and made the code available on GitHub. All that’s needed to use it is to reference the assembly and then add one line of code after the call to OAuthWebSecurity.VerifyAuthentication (so in the same action method mentioned above):
[AllowAnonymous]
public ActionResult ExternalLoginCallback(string returnUrl)
{
    AuthenticationResult result = OAuthWebSecurity.VerifyAuthentication(Url.Action("ExternalLoginCallback", new { ReturnUrl = returnUrl }));
    if (!result.IsSuccessful)
    {
        return RedirectToAction("ExternalLoginFailure");
    }

    // maps the ExtraData to Claims for the current user
    OAuthClaims.SetClaimsFromAuthenticationResult(result);

    ...
}
Now the ExtraData comes back as Claims (and are mapped using the standard ClaimTypes) and are accessible where all claims are: ClaimsPrincipal.Current.Claims. Here’s an example of querying for the user’s email:
var principal = System.Security.Claims.ClaimsPrincipal.Current;
var emailClaim = principal.FindFirst(ClaimTypes.Email);
if (emailClaim != null)
{
    var email = emailClaim.Value;
}
And here’s an example of enumerating all of the user’s claims and displaying them in a <table> in Razor:
@{
    var principal = System.Security.Claims.ClaimsPrincipal.Current;
    <h2>Claims</h2>
    <table>
        @foreach (var claim in principal.Claims)
        {
            <tr>
                <td>@claim.Type</td>
                <td>@claim.Value</td>
                <td>@claim.Issuer</td>
            </tr>
        }
    </table>
}
Feel free to provide feedback and enjoy.
Using OAuthWebSecurity without SimpleMembership
I’ve been researching the new support in ASP.NET for OAuth and OpenID authentication. It provides a nice and easy to use wrapper on DotNetOpenAuth. The main APIs are on the OAuthWebSecurity class and they provide methods to authenticate against your OAuth and OpenID providers as well as associate those OAuth and OpenID accounts to an account with your local membership provider (and strictly speaking your simple membership provider). Personally, I dislike the coupling between the authentication piece and the persistence piece. Fortunately this API can still be used without using providers.
The main APIs to be aware of are:
- OAuthWebSecurity.RegisterXxxClient
- OAuthWebSecurity.RegisteredClientData
- OAuthWebSecurity.RequestAuthentication
- OAuthWebSecurity.VerifyAuthentication
RegisterXxxClient (where Xxx is: Microsoft, Twitter, Facebook, Google, Yahoo or LinkedIn)
The various Register APIs allow you to initialize which OAuth/OpenID identity providers you want to use (many of these require passing your application identifier and secret).
RegisteredClientData
This API provides the list of the registered identity providers. This is necessary for the ProviderName property when requesting authentication.
RequestAuthentication
This is the API to invoke to trigger a login with one of the identity providers. The parameters are the identity provider name (so one of the ProviderName values from the RegisteredClientData collection) and the return URL where you will receive the authentication token from the identity provider. Internally it does a Response.Redirect to take the user to the identity provider consent screen.
VerifyAuthentication
This API validates the authentication token from the identity provider and returns the results. You can then use these results to log the user into your own application (typically with Forms Authentication). There is also additional data returned from the identity provider such as email, gender, etc. Different identity providers return different information.
So to trigger the authentication, this is all you need to do:
[AllowAnonymous]
public void LoginWithProvider(string provider)
{
    OAuthWebSecurity.RequestAuthentication(provider, Url.Action("AuthenticationCallback"));
}

[AllowAnonymous]
public ActionResult AuthenticationCallback()
{
    var result = OAuthWebSecurity.VerifyAuthentication();
    if (result.IsSuccessful)
    {
        // name of the provider we just used
        var provider = result.Provider;
        // provider's unique ID for the user
        var uniqueUserID = result.ProviderUserId;
        // since we might use multiple identity providers, then
        // our app uniquely identifies the user by combination of
        // provider name and provider user id
        var uniqueID = provider + "/" + uniqueUserID;

        // we then log the user into our application
        // we could have done a database lookup for a
        // more user-friendly username for our app
        FormsAuthentication.SetAuthCookie(uniqueID, false);

        // dictionary of values from identity provider
        var userDataFromProvider = result.ExtraData;
        var email = userDataFromProvider["email"];
        var gender = userDataFromProvider["gender"];

        return View("LoggedIn", result);
    }
    return View("Error", result.Error);
}
It’s really up to you how to identify the username when you’re logging them in with FormsAuthentication, but it’s important that to uniquely identify your users your must use both the provider name and the provider user id. In the above snippet we’re just logging the user in with that, but you could built your own back-end database to allow users to manage their own username for your application. This mapping is in essence what the new SimpleMembership system is doing, and if you don’t need or want to control the database schema then it’s a fine solution.
Also notice the extra data from the authentication result. This contains additional user information the identity provider has returned to the application. From what I can tell, here is the breakdown (beyond ProviderUserId) of what data each provider returns (these are the actual keys used in the ExtraData dictionary):
Google: email, country, firstName, lastName
Microsoft: name, link, gender, firstname, lastname
Facebook: username (which is really an email address), name, link (URL to their facebook page), gender, birthday
Twitter: name, location, description, url (URL to their Twitter page)
Yahoo: email, fullName
LinkedIn: name, headline, summary, industry
Microsoft did a nice job making it easy to use DotNetOpenAuth.
Beware accessing Response.Cookies
I learned something new about ASP.NET today that I had never come across before. I was writing code that looked something like this:
private void CheckForFormsLogout(HttpContext ctx)
{
    if (ctx.User.Identity.IsAuthenticated)
    {
        var logoutCookie = ctx.Response.Cookies[FormsAuthentication.FormsCookieName];
        if (logoutCookie != null)
        {
            var now = DateTime.UtcNow;
            if (DateTime.MinValue < logoutCookie.Expires && logoutCookie.Expires < now)
            {
                // yes, user is logging out
            }
        }
    }
}
Turns out this code has a serious flaw that is actually triggering the logout. The issue is how I was checking for the cookie on the Response.Cookies collection. Turns out that the CookieCollection class creates a cookie if the one you’re asking for doesn’t exist. So in my attempt to see if the cookie was present, I was creating it. The newly created cookie was empty and thus had the side effect of replacing the valid forms authentication cookie with an empty value.
Here’s the change I made to correct the problem:
private void CheckForFormsLogout(HttpContext ctx)
{
    if (ctx.User.Identity.IsAuthenticated)
    {
        if (ctx.Response.Cookies.AllKeys.Contains(FormsAuthentication.FormsCookieName))
        {
            var logoutCookie = ctx.Response.Cookies.Get(FormsAuthentication.FormsCookieName);
            if (logoutCookie != null)
            {
                var now = DateTime.UtcNow;
                if (DateTime.MinValue < logoutCookie.Expires && logoutCookie.Expires < now)
                {
                    // yes the user is logging out
                }
            }
        }
    }
}
The same issue applies to Request.Cookies.
You learn something new every day :)
Think twice about using MembershipProvider (and SimpleMembership)
I’ve been talking about this topic since ASP.NET 2.0 was released in 2005 and to be honest this is sort of old news. I never put together a post on it, but since the new SimpleMembership is now released in ASP.NET 4.5 I figured now is time.
Brief History (as I have surmised) about the MembershipProvider.
Back in ~2003 Rob Howard from Microsoft had developed a sample application written in ASP.NET 1.1 showing how ASP.NET (WebForms) could be a viable framework for building common platforms such as web forums comparable to PHP-Nuke. Part of that effort was developing this notion of a “provider” programming model which was an abstract pluggable API for common aspects of the application architecture such as authentication. The idea is that a developer could plugin a custom provider to access arbitrary databases for the users’ usernames and passwords. The hosting application would simply code against this provider abstraction and the custom implementation would be used to contact the database, thus decoupling the two.
Sounds good, eh? So good that the ASP.NET team decided to incorporate the provider model for authentication (membership), roles, user profile, session and other aspects of the runtime into the ASP.NET 2.0 release in 2005. To capitalize on the provider model several new controls were added such as the CreateUserWizard, Login, ResetPassword and ChangePassword controls. These controls, given the provider model, could implement these features without knowing the details of the database being used.
On top of all of this, Microsoft even provided (no pun intended) concrete implementations of the various providers that used SQL Server to store the data (user credentials, roles, profile, etc). So to implement authentication in your application all you had to do was run their SQL script and drag-n-drop a Logon control onto the home page and voilà — security!
Wasn’t that easy? This was touted as the new way to do security in ASP.NET. In fact the membership provider started becoming synonymous with web application security. Also this new provider model was positioned as making security easy in ASP.NET. These last two points is where I have an issue…
What’s important in security?
It’s import to understand how security works in your application so that you can be confident (without a false sense of security) that it’s doing what you need and that you aren’t making mistakes in your application that somehow compromise this security.
By focusing on membership as what security is all about then the other important aspects of web application security are often overlooked. I wrote a bit about this already in how Membership is not the same as Forms Authentication.
Given that the majority of security in a web application is not in the realm of membership, what’s the provider model doing for us? Well, it’s just a database look-up. It’s an abstract API for managing users and their credentials. This is not to say that the storage of credentials isn’t important in web security — it is. I’ll come back to this later.
What’s wrong with the MembershipProvider?
The biggest problem with the membership provider is that the API is a very leaky abstraction. The MembershipProvider is an abstract base class for managing user credentials that has APIs such CreateUser, DeleteUser and ValidateUser (to authenticate credentials). It was originally designed for a forums application and has a total of 27 abstract methods that may or may not be pertinent to your application’s security needs. My favorite of these is GetNumberOfUsersOnline, which makes sense for a forums application (sort of) but otherwise is asinine.
Given the 27 abstract methods, a custom provider would of course be required to implement all of these. In many scenarios if the method isn’t pertinent then a NotImplementedException is the common implementation. The unfortunate part about this is now the application using the custom provider will need to know which methods are not implemented. Even some of the MembershipProvider-derived classes implemented by Microsoft throw NotImplementedException so you have to know which concrete provider you’re using. Herein begins the leaky abstraction.
Another one of those methods on the MembershipProvider is UnlockUser. This was designed into the API to allow an administrator to unlock an account if the provider detects that someone is trying to guess a user’s password. If the provider detects more than some number of guesses then it “locks” the account and prevents further logins. This is a decent feature, except there’s no automatic unlock so this security feature turns out to be a nice denial-of-service attack. Anyway, my complaint is that there’s no comparable LockUser API. What if an administrator decided the user was no longer allowed to login? A way around this would to be bypass the provider and update the database table that contains the flag directly (I suppose another approach would be to try to login as the user with a bad password over and over until their account gets locked). Anyway, this is an example of a missing feature where the API doesn’t meet a security requirement and the solution is to bypass the provider to achieve the goal. This adds to the leaky abstraction.
Given that the MembershipProvider is a base class, people are often misled into thinking they can derive from it if they need to augment the semantics (either for custom APIs or additional data stored with the user). One example is requiring more than username and password for authentication (such as a RSA secure ID for multi-factor authentication). To support this why not add a new ValidateUser that accepts three arguments instead of two? Technically it’s possible, but the built-in Login control isn’t designed for three parameters (let alone the CreateUserWizard). So you’d have to build your own controls for your custom parameters then then would have to downcast the provider base class to the custom provider class and manually invoke the custom ValidateUser method. All while pigeon-holing yourself into this provider model that doesn’t meet your needs (remember 27 abstract methods that may or may not be pertinent). Yet another leaky abstraction.
Another complaint (albeit a bit dated at this point) is that the SqlMembershipProvider is not using modern password storage techniques. This seems strange since in the same .NET 2.0 release in 2005 the Rfc2898DeriveBytes class was released which is the proper way to generate a password hash. My understanding is that the newer universal providers do use this and those are configured by default in the new project templates.
If you’re using MVC we don’t use the control model of WebForms. This means that much of the purported re-use of the provider model is lost due to the lack of Login, CreateUserWizard and other controls. The project templates so make up for some of this in MVC, though.
Lastly, Membership doesn’t follow SRP which forces provider implementers to violate DRY (which so highly regarded these days by modern developers). The logic of membership (mainly password management and account locking) should be decoupled from the rest (mainly the storage piece). Decoupling these two would allow for reuse of the good principals of account management while allowing alternative storage mechanisms without needing to re-implement the security parts. When I build my security systems, I build an account service that uses a user repository. This provides a nice separation of concerns.
For about a year or two after ASP.NET 2.0 was released on every new project I attempted to use membership with a good-faith effort, and on every project at some point our requirements exceeded what the membership API anticipated. We had to back out the code using the membership provider and build our own plumbing for storing user credentials.
What’s good about the MembershipProvider?
The good part about the membership provider isn’t the model per-se, but rather how the built-in implementations provide password management. When storing credentials, proper password hashing is crucial. This is the one useful thing from the provider model that you’d need to implement if you’re doing your own framework for storing credentials. Fortunately since the release of MVC 3 (and really Razor and WebMatrix) there is a Crypto class that provides modern APIs for password management and validation. So one more reason that the provider model is not needed.
Edit: I finally got around to posting about password management with the Crypto API. This illustrates how easy it is to manage passwords yourself. As I say below in one of the comments, I see this as the final nail in the membership provider coffin.
What about SimpleMembership?
There are some nice additions like the account reset token and the extensions to support OAuth/OpenID, but unfortunately I don’t think SimpleMembership improves on the situation. The SimpleMembership class ultimately derives from the MembershipProvider base class so it built upon the same house of cards. It seems obvious why it was designed this way — Microsoft wanted to provide some amount of backwards compatibility so that old code could still call into the new SimpleMembership implementation, but it’s still the same leaky abstraction issue.
Now the way they attempt to wean developers off of the leaky MembershipProvider API is they have introduced a new WebSecurity API that delegates to the SimpleMembership provider. This helps from a consumer perspective, but if you want your own database then you still have to implement a MembershipProvider and now we’re back to the leaky abstraction. Also the WebSecurity API continues to the blur the distinction between what the provider model is doing and what forms authentication is doing.
Also, another issue with SimpleMembership is that it has the same coupling of account management logic and persistence. SimpleMembership contains hard-coded SQL statements to build tables and performs selects, inserts, updates and deletes against their schema (and some of yours as well). The way it was coded, SimpleMembership is tied to a Microsoft database (SQL Server, SQL Azure, etc). It would have been nice if they could have decoupled the logic for supporting reset tokens and OAuth/OpenID account associations from the persistence of said data. If you want to store this data in another database you not only have to re-write the persistence code but you also have to re-write the same logic that’s in the SimpleMembership provider (so essentially the same SRP/DRY complaint above about the MembershipProvider). If you have to rewrite all of this logic anyway, then why pigeon-hole yourself into the leaky MembershipProvider abstraction?
It’s too bad since they had an opportunity to make a clean break.
Conclusion
If the membership provider API models exactly what you want and need in storing user credentials, then great — use it. But if you’re building a more complex application than your golf league website then chances are that you’ll need a bit more control over how this data is being maintained in the database.
The goal was to simplify but given the abstraction model and all the layers of Membership I find that people get confused and focus on the wrong details of security. I applaud Microsoft for the attempt… really. The membership provider model is an almost impossible API to design for everyone else’s security needs and that’s unfortunately why it so often falls short.
Edit: So as my rebuttal to the membership provider and since I wouldn’t use it in any real projects, I’ve always written my own account management code. Since I’ve done this time and time again, I finally decided to do it one last time and then open source it. So here’s my MembershipReboot open source library for account management. Bonus: It’s also claims aware.
Sharing a single _ViewStart across areas in ASP.NET MVC
When using Areas in MVC it’s a common desire to want to use a single layout template for all views. To easily assign a layout template the most common approach is to use a ~/Views/_ViewStart.cshtml (or .vbhtml) in the parent directory of the views. The problem is that when using areas, the ~/Views/_ViewStart.cshtml is not in a parent directory because areas are located in ~/Areas (a sibling of ~/Views). This means the ~/Views/_ViewStart.cshtml is not considered for assigning a default layout template for views within areas.

One solution commonly suggested is to put a _ViewStart.cshtml in the views directory inside the area, but this becomes tedious since you need to do it for each area, as such:

So the obvious approach is to place the _ViewStart.cshtml in the root folder of the entire project. The only problem is that when you create ~/_ViewStart.cshtml and then run the application you end up with this compilation error:

In its wonderful eloquence, this is explaining that you’re using a .cshtml file in MVC and not in WebMatrix. The issue here is that Razor is used in two contexts: 1) MVC and 2) WebMatrix. WebMatrix is the other development framework and tooling under the “One ASP.NET” and it uses Razor as its syntax for mixing markup and code to emit HTML pages dynamically (so in a sense the modern replacement for classic ASP).
So our problem is that we need to tell the ASP.NET compiler to compile this in the context of MVC. This is simple – the same razor configuration that was in ~/Views/web.config simply needs to be moved (or copied) out to the top-level ~/web.config (so the <configSections> and the <system.web.webPages.razor> elements):

And that’s it. You can now have a single ~/_ViewStart.cshtml that assigns a default layout template for all your views (both inside and outside areas).
Oh except for one problem. If you create the top-level ~/_ViewStart.cshtml and run the application prior to copying the configuration values in ~/web.config you might still get the same error from before:
Type ‘ASP._Page__ViewStart_cshtml’ does not inherit from ‘System.Web.WebPages.StartPage’.
The issue here is that once the ~/_ViewStart.chtml has been compiled by the ASP.NET runtime the assembly is cached and not re-compiled when the ~/web.config is changed. The simple fix is to make the changes in ~/web.config and then open and save ~/_ViewStart.chtml. Updating the timestamp on ~/_ViewStart.chtml triggers a recompile but now with the updated settings in ~/web.config.
Here’s a sample project that illustrates this working: http://sdrv.ms/PSTHKk
The default route for WebAPI is similar to the default route for MVC. It looks like this:
public static void RegisterRoutes(RouteCollection routes)
{
    routes.MapHttpRoute(
        "DefaultApi",
        "api/{controller}/{id}",
        new { id = RouteParameter.Optional }
    );
}
And here’s what a typical WebAPI controller will look like:
public class MoviesController : ApiController
{
    public IEnumerable<Movie> Get() { ... }
    public HttpResponseMessage Get(int id)  { ... }
    public HttpResponseMessage Post(Movie movie)  { ... }
    public HttpResponseMessage Put(int id, Movie movie)  { ... }
    public HttpResponseMessage Delete(int id)  { ... }
}
The typical URLs this controller is expecting are:
GET ~/api/movies/
GET ~/api/movies/1
POST ~/api/movies/
PUT ~/api/movies/1
DELETE ~/api/movies/1
See the problem? I didn’t either until I was writing my C# client code and I had a bug in it. Here was the hastily written client code (hastily meaning I did a bunch of copy & paste):
public Task<MovieResponse> GetAsync(int id)
{
    var client = new HttpClient();
    var task = client.GetAsync(baseUrl + "/" + id, movie);
    ...
}
public Task<MovieResponse> PostAsync(Movie movie)
{
    var client = new HttpClient();
    var task = client.PostAsJsonAsync<Movie>(baseUrl + "/" + movie.ID, movie);
    ...
}
public Task<MovieResponse> PutAsync(Movie movie)
{
    var client = new HttpClient();
    var task = client.PostAsJsonAsync<Movie>(baseUrl + "/" + movie.ID, movie);
    ...
}
So see the problem now? The bug is that the movie ID is accidentally passed in the URL for the POST. The POST is expecting “~/api/movies/”, but in my bug above the URL was getting created as “~/api/movies/0” (the movie’s ID hadn’t yet been initialized and was 0). I discovered the bug when my server code was returning the wrong Location header for the 201 response:
public HttpResponseMessage Post(Movie movie)
{
    var newMovie = repository.Create(movie);
    var response = Request.CreateResponse(HttpStatusCode.Created, newMovie);
    var url = VirtualPathUtility.AppendTrailingSlash(Request.RequestUri.AbsoluteUri) + newMovie.ID;
    var uri = new Uri(url);
    response.Headers.Location = uri;
    return response;
}
And it was returning “~/api/movies/0/1” as the newly created resource’s URL, which was wrong. So I was very surprised that this incorrect request URL was making its way into my controller’s Post method, but knowing how routing works this should not be surprising at all. It’s certainly not expected, to say the least.
Arguably the bug is in the client code, but the server shouldn’t allow this. And for any WebAPI project with the default route this can happen.
So the issue is that the default route allows a POST when there is an id parameter. This is broken, IMO, so we need to fix it. To do so we’ll build a route constraint to prevent a POST when there’s an id parameter. Here’s the implementation of the route constraint:
public class ParamNotAllowedForMethod : IRouteConstraint
{
    string method;

    public ParamNotAllowedForMethod(string method)
    {
        this.method = method;
    }

    public bool Match(
        HttpContextBase httpContext,
        Route route,
        string parameterName,
        RouteValueDictionary values,
        RouteDirection routeDirection)
    {
        if (routeDirection == RouteDirection.IncomingRequest &&
            httpContext.Request.HttpMethod == method &&
            values[parameterName] != null)
        {
            return false;
        }

        return true;
    }
}
And he’s the updated route registration that uses the route constraint (the last parameter to MapHttpRoute). The key that’s used for the route constraint indicates which routing parameter to check and the constructor parameter indicates which method is not allowed.
public static void RegisterRoutes(RouteCollection routes)
{
    routes.MapHttpRoute(
        "DefaultApi",
        "api/{controller}/{id}",
        new { id = RouteParameter.Optional },
        new { id = new ParamNotAllowedForMethod("POST") }
    );
}
I will be using this route constraint for all WebAPI projects from now on.
MVC 4, AntiForgeryToken and Claims
Using Html.AntiForgeryToken in MVC 4 has changed slightly from the previous version if you’re building a claims-aware application. In prior versions User.Identity.Name was included in the anti-forgery token as a way to validate the <form> being submitted, but in MVC 4 if the identity is IClaimsIdentity (WIF) or ClaimsIdentity (.NET 4.5) then the anti-forgery token attempts to put one or more claim values into the anti-forgery token.
The problem is which claim(s) should it use? The value needs to uniquely identifier the user, so by default MVC expects the nameidentifier (“http://schemas.xmlsoap.org/ws/2005/05/identity/claims/nameidentifier” from OASIS) and the identityprovider (“http://schemas.microsoft.com/accesscontrolservice/2010/07/claims/identityprovider” from Windows Azure ACS). So if you’re using ACS as your STS then you’re all set. If you’re not using ACS then you’ll see this error:
A claim of type ‘http://schemas.xmlsoap.org/ws/2005/05/identity/claims/nameidentifier’ or ‘http://schemas.microsoft.com/accesscontrolservice/2010/07/claims/identityprovider’ was not present on the provided ClaimsIdentity. To enable anti-forgery token support with claims-based authentication, please verify that the configured claims provider is providing both of these claims on the ClaimsIdentity instances it generates. If the configured claims provider instead uses a different claim type as a unique identifier, it can be configured by setting the static property AntiForgeryConfig.UniqueClaimTypeIdentifier.
Unfortunately this error is a little confusing because it says “nameidentifier or identityprovider” even though you may have one of the two. By default you need both.
Anyway, if you’re not using ACS as your STS then the above error pretty much tells you what’s needed to solve the problem. You need to tell MVC which claim you want to use to uniquely identify the user. You do this by setting the AntiForgeryConfig.UniqueClaimTypeIdentifier property (typically in App_Start in global.asax). For example (assuming you want to use nameidentifier as the unique claim):
using System.Web.Helpers;

protected void Application_Start()
{
    AreaRegistration.RegisterAllAreas();

    FilterConfig.RegisterGlobalFilters(GlobalFilters.Filters);
    RouteConfig.RegisterRoutes(RouteTable.Routes);
    BundleConfig.RegisterBundles(BundleTable.Bundles);

    AntiForgeryConfig.UniqueClaimTypeIdentifier = ClaimTypes.NameIdentifier;
}
Dominick’s recent SessionToken support and WebAPI Authorization features have now been back-ported to the 4.0 version of Thinktecture.IdentityModel. Expect to see an updated NuGet release in the next few days.
My second contribution to the Thinktecture.IdentityModel security library is a full-featured CORS implementation. Many other sample implementations only emit the Access-Control-Allow-Origin header, but there’s more to it than that. The implementation in Thinktecture.IdentityModel follows the W3C Working Draft 3 from April 2012. There is a rich configuration API to control the various settings that are involved with CORS. These settings include which resource you want to configure, which origins are allowed, which HTTP methods are allowed, which request and/or response headers are allowed and are cookies allowed.
In this first release there is support for WebAPI, ASP.NET MVC and IIS. For WebAPI you configure your settings per controller. For MVC you can configure the settings per controller or for specific controller actions. For IIS you configure the settings per URL. If there’s enough interest, then perhaps in a future version I can add support for WCF REST and WCF Data Services.
I won’t bother explaining CORS since there are already enough posts on it elsewhere. Instead I’ll just show how to get started with the library. First, reference the NuGet package. Next, depending on the type of application (WebAPI, MVC or IIS) you need to configure how you want CORS support. Below shows each of the different environments:
WebAPI
In WebAPI the implementation is a delegating handler. This allows the CORS settings to be global or per-route (which is forthcoming post-RC). For example if you were to configure it globally then in global.asax‘s Application_Start you would have a call out to the configuration class passing the global HttpConfiguration object (this follows the new style of factoring out configuration to separate classes in the App_Start folder):
protected void Application_Start()
{
   ...

   CorsConfig.RegisterCors(GlobalConfiguration.Configuration);
}
And then in App_Start/CorsConfig.cs:
public class CorsConfig
{
   public static void RegisterCors(HttpConfiguration httpConfig)
   {
      WebApiCorsConfiguration corsConfig = newWebApiCorsConfiguration();

      // this adds the CorsMessageHandler to the HttpConfiguration's
      // MessageHandlers collection
      corsConfig.RegisterGlobal(httpConfig);

      // this allow all CORS requests to the Products controller
      // from the http://foo.com origin.
      corsConfig
         .ForResources("Products")
         .ForOrigins("http://foo.com")
         .AllowAll();
   }
}
In WebAPI resources are identified by the controller name as in the above example for the “Products” controller.
MVC
In MVC you need to register a HttpModule to enable CORS support, so in web.config:
<system.webServer>
   <modules runAllManagedModulesForAllRequests="true">
      <add name="MvcCorsHttpModule"
         type="Thinktecture.IdentityModel.Http.Cors.Mvc.MvcCorsHttpModule"/>
   </modules>
</system.webServer>
And then again in global.asax you would configure the settings:
protected void Application_Start()
{
   ...

   RegisterCors(MvcCorsConfiguration.Configuration);
}

private void RegisterCors(MvcCorsConfiguration corsConfig)
{
   corsConfig
      .ForResources("Products.GetProducts")
      .ForOrigins("http://foo.com")
      .AllowAll();
}
In MVC resources can either be identified just by the controller name (with just “Controller” for the resource name) or by the controller and action (as with the above sample with the “Controller.Action” syntax).
IIS
In IIS you need to register a HttpModule (different than the one for MVC), so in web.config:
<system.webServer>
   <modules>
      <add name="CorsHttpModule"
         type="Thinktecture.IdentityModel.Http.Cors.IIS.CorsHttpModule"/>
   </modules>
</system.webServer>
And then again in global.asax you would configure the settings:
protected void Application_Start(object sender, EventArgs e)
{
   ...

   ConfigureCors(UrlBasedCorsConfiguration.Configuration);
}

void ConfigureCors(CorsConfiguration corsConfig)
{
   corsConfig
      .ForResources("~/Handler1.ashx")
      .ForOrigins("http://foo.com", "http://bar.com")
      .AllowAll();
}
In IIS resources are identified by the application relative path (thus the “~/path/resource” syntax).
Other Configuration Options
While the above samples show a minimal amount of code to get CORS enabled and running in your app, these are some of the least restrictive settings. Typically more thought should go into the settings and so there is a rich API for configuring the various CORS settings. Here are some more examples:
public static void ConfigureCors(CorsConfiguration corsConfig)
{
   // this allows http://foo.com to do GET or POST on Values1 controller
   corsConfig
      .ForResources("Values1")
      .ForOrigins("http://foo.com")
      .AllowMethods("GET", "POST");

   // this allows http://foo.com to do GET and POST, pass cookies and
   // read the Foo response header on Values2 controller
   corsConfig
      .ForResources("Values2")
      .ForOrigins("http://foo.com")
      .AllowMethods("GET", "POST")
      .AllowCookies()
      .AllowResponseHeaders("Foo");

   // this allows http://foo.com and http://foo.com to do GET, POST,
   // and PUT and pass the Content-Type header to Values3 controller
   corsConfig
      .ForResources("Values3")
      .ForOrigins("http://foo.com", "http://bar.com")
      .AllowMethods("GET", "POST", "PUT")
      .AllowRequestHeaders("Content-Type");

   // this allows http://foo.com to use any method, pass cookies, and
   // pass the Content-Type, Foo and Authorization headers, and read
   // the Foo response header for Values4 and Values5 controllers
   corsConfig
      .ForResources("Values4", "Values5")
      .ForOrigins("http://foo.com")
      .AllowAllMethods()
      .AllowCookies()
      .AllowRequestHeaders("Content-Type", "Foo", "Authorization")
      .AllowResponseHeaders("Foo");

   // this allows all methods and all request headers (but no cookies)
   // from all origins to Values6 controller
   corsConfig
      .ForResources("Values6")
      .AllowAllOriginsAllMethodsAndAllRequestHeaders();

   // this allows all methods (but no cookies or request headers)
   // from all origins to Values7 controller
   corsConfig
      .ForResources("Values7")
      .AllowAllOriginsAllMethods();

   // this allows all CORS requests from origin http://bar.com
   // for all resources that have not been explicitly configured
   corsConfig
      .ForOrigins("http://bar.com")
      .AllowAll();

   // this allows all CORS requests to all other resources that don’t
   // have an explicit configuration. This opens them to all origins, all
   // HTTP methods, all request headers and cookies. This is the API to use
   // to get started, but it’s a sledgehammer in the sense that *everything*
   // is wide-open.
   corsConfig.AllowAll();
}
Of course, feedback is welcome. Enjoy.
Edit: Common configuration issues when enabling CORS on IIS.
Thinktecture.IdentityModel 4.0
As Dominick mentioned recently, I have started to help working on the Thinktecture.IdentityModel security library. My first contribution (which will be ongoing) is to maintain a .NET 4.0 compatible version (while Dom works on the 4.5 version). The claims based part of this will continue to use Windows Identity Foundation while the 4.5 version will use the new claims APIs built into .NET 4.5. I think there are enough people that will be on 4.0 for a while that this effort is worthwhile. There’s more than just claims support in there – there’s JWT and SWT token support, WebAPI authorization helpers, cookie protection helpers and more.
Here is the 4.0 GitHub repository.
Demos – 5th Annual Hartford Code Camp 2012
Thanks for attending my sessions on Mobile Support in MVC 4 and jQuery Mobile and Claims-based Security with Windows Identity Foundation at the 5th Annual Hartford Code Camp.
You can access the demos and slides here.
Use the MachineKey API to protect values in ASP.NET
It’s quite common to need to preserve state across requests in a web application. This is typically in the form of a cookie, query string or hidden form field. Commonly the state that needs to be sent back to the client is sensitive or we want to ensure it’s not been modified by the user. The typical approach to this should be encrypting (protect) and MACing (verify) the value. Writing this sort of crypto code yourself is possible but not ideal. Fortunately in ASP.NET the MachineKey API already provides this functionality. And yes, this is the same as the <machineKey> infrastructure already used to protect Forms authentication and ViewState.
The API is slightly different between 4.0 and 4.5. Here’s the 4.0 usage with some helpers:
string Protect(byte[] data)
{
    if (data == null || data.Length == 0) return null;
    return MachineKey.Encode(data, MachineKeyProtection.All);
}

byte[] Unprotect(string value)
{
    if (String.IsNullOrWhiteSpace(value)) return null;
    return MachineKey.Decode(value, MachineKeyProtection.All);
}
MachineKey.Encode accepts a byte[] to protect and returns a string. The second parameter is an enum that indicates if you want encryption, validation or both. I’d typically suggest both (MachineKeyProtection.All). The returned string can then be used to pass back to the client as a cookie value or a query string value without concern for viewing or tampering. MachineKey.Decode simply reverses the process.
And here’s the 4.5 usage (it supports a slightly more sophisticated usage):
const string MachineKeyPurpose = "MyApp:Username:{0}";
const string Anonymous = "<anonymous>";

string GetMachineKeyPurpose(IPrincipal user)
{
    return String.Format(MachineKeyPurpose,
        user.Identity.IsAuthenticated ? user.Identity.Name : Anonymous);
}

string Protect(byte[] data)
{
    if (data == null || data.Length == 0) return null;
    var purpose = GetMachineKeyPurpose(Thread.CurrentPrincipal);
    var value = MachineKey.Protect(data, purpose);
    return Convert.ToBase64String(value);
}

byte[] Unprotect(string value)
{
    if (String.IsNullOrWhiteSpace(value)) return null;
    var purpose = GetMachineKeyPurpose(Thread.CurrentPrincipal);
    var bytes = Convert.FromBase64String(value);
    return MachineKey.Unprotect(bytes, purpose);
}
In 4.5 the old APIs are deprecated in favor of these new Protect and Unprotect APIs. The new APIs no longer accept the level of protection (they always encrypt and MAC now [which is good]) and instead now accept a new parameter which is called “purpose”. This purpose parameter is intended to act somewhat as a validation mechanism. If we use a value that’s specific to the user (as we do above with the GetMachineKeyPurpose helper) we then are verifying that the value can only be unprotected by the same user. This is a nice addition in 4.5.
In my Cookie-based TempData provider I used this exact technique — I didn’t want to reinvent crypto or introduce new keys, so leveraging the ASP.NET machine key APIs made a lot of sense.
Oh and one caveat: this does not prevent an eavesdropper from intercepting the value and replaying it, so (as usual) SSL is imperative.
Update: Great follow-up reading about the internals of the MachineKey:
5th Annual Hartford Code Camp 2012
I’ll be speaking at the 5th Annual Hartford Code Camp on June 23rd, 2012. I’ll be presenting two topics: one on Mobile Support in MVC 4 and jQuery Mobile and another on Claims-based Security with Windows Identity Foundation.
Cookie based TempData provider
TempData is a nice feature in MVC and, if I am not mistaken, was inspired by the Flash module from Ruby on Rails. It’s basically a way to maintain some state across a redirect.
In Rails the default implementation uses a cookie to store the data which makes this a fairly lightweight mechanism for passing data from one request to the next. Unfortunately the default implementation of TempData in MVC uses Session State as the backing store which makes it less than ideal. That’s why I wanted to show how to build an implementation that uses a cookie, so here’s the CookieTempDataProvider.
In implementing this it was important to acknowledge that the data stored in TempData is being issued as a cookie to the client, which means it’s open to viewing and modification by the end user. As such, I wanted to add protections from modification and viewing (modification being the more important of the two). The implementation uses the same protection facilities as the ASP.NET machine key mechanisms for encrypting and signing Forms authentication cookies and ViewState. We’re also doing compression since cookies are limited in size.
The code is available on GitHub. I also wrapped this up into a NuGet package (BrockAllen.CookieTempData) so all that’s necessary is to reference the assembly via NuGet and all controllers will now use the Cookie-based TempData provider. If you’re interested in mode details, read on…
The code is fairly self-explanatory:
public class CookieTempDataProvider : ITempDataProvider
{
    const string CookieName = "TempData";

    public void SaveTempData(
        ControllerContext controllerContext,
        IDictionary<string, object> values)
    {
        // convert the temp data dictionary into json
        string value = Serialize(values);
        // compress the json (it really helps)
        var bytes = Compress(value);
        // sign and encrypt the data via the asp.net machine key
        value = Protect(bytes);
        // issue the cookie
        IssueCookie(controllerContext, value);
    }

    public IDictionary<string, object> LoadTempData(
        ControllerContext controllerContext)
    {
        // get the cookie
        var value = GetCookieValue(controllerContext);
        // verify and decrypt the value via the asp.net machine key
        var bytes = Unprotect(value);
        // decompress to json
        value = Decompress(bytes);
        // convert the json back to a dictionary
        return Deserialize(value);
    }
    string GetCookieValue(ControllerContext controllerContext)
    {
        HttpCookie c = controllerContext.HttpContext.Request.Cookies[CookieName];
        if (c != null)
        {
            return c.Value;
        }
        return null;
    }

    void IssueCookie(ControllerContext controllerContext, string value)
    {
        HttpCookie c = new HttpCookie(CookieName, value)
        {
            // don't allow javascript access to the cookie
            HttpOnly = true,
            // set the path so other apps on the same server don't see the cookie
            Path = controllerContext.HttpContext.Request.ApplicationPath,
            // ideally we're always going over SSL, but be flexible for non-SSL apps
            Secure = controllerContext.HttpContext.Request.IsSecureConnection
        };

        if (value == null)
        {
            // if we have no data then issue an expired cookie to clear the cookie
            c.Expires = DateTime.Now.AddMonths(-1);
        }

        if (value != null || controllerContext.HttpContext.Request.Cookies[CookieName] != null)
        {
            // if we have data, then issue the cookie
            // also, if the request has a cookie then we need to issue the cookie
            // which might act as a means to clear the cookie
            controllerContext.HttpContext.Response.Cookies.Add(c);
        }
    }

    string Protect(byte[] data)
    {
        if (data == null || data.Length == 0) return null;

        return MachineKey.Encode(data, MachineKeyProtection.All);
    }

    byte[] Unprotect(string value)
    {
        if (String.IsNullOrWhiteSpace(value)) return null;

        return MachineKey.Decode(value, MachineKeyProtection.All);
    }

    byte[] Compress(string value)
    {
        if (value == null) return null;

        var data = Encoding.UTF8.GetBytes(value);
        using (var input = new MemoryStream(data))
        {
            using (var output = new MemoryStream())
            {
                using (Stream cs = new DeflateStream(output, CompressionMode.Compress))
                {
                    input.CopyTo(cs);
                }

                return output.ToArray();
            }
        }
    }

    string Decompress(byte[] data)
    {
        if (data == null || data.Length == 0) return null;

        using (var input = new MemoryStream(data))
        {
            using (var output = new MemoryStream())
            {
                using (Stream cs = new DeflateStream(input, CompressionMode.Decompress))
                {
                    cs.CopyTo(output);
                }

                var result = output.ToArray();
                return Encoding.UTF8.GetString(result);
            }
        }
    }

    string Serialize(IDictionary<string, object> data)
    {
        if (data == null || data.Keys.Count == 0) return null;

        JavaScriptSerializer ser = new JavaScriptSerializer();
        return ser.Serialize(data);
    }

    IDictionary<string, object> Deserialize(string data)
    {
        if (String.IsNullOrWhiteSpace(data)) return null;

        JavaScriptSerializer ser = new JavaScriptSerializer();
        return ser.Deserialize<IDictionary<string, object>>(data);
    }
}
Normally to use a custom TempDataProvider you must override CreateTempDataProvider from the Controller base class as such:
public class HomeController : Controller
{
    public ActionResult Index()
    {
        return View();
    }

    protected override ITempDataProvider CreateTempDataProvider()
    {
        return new CookieTempDataProvider();
    }
}
Ick — this means you either have to override this in each controller or have to have planned ahead and created a common base Controller class for the entire application. Fortunately there’s another way — the TempDataProvider is assignable on the Controller base class. This means that upon controller creation you can assign it and this can easily be done in a custom controller factory which I implemented in the NuGet package:
class CookieTempDataControllerFactory : IControllerFactory
{
    IControllerFactory _inner;
    public CookieTempDataControllerFactory(IControllerFactory inner)
    {
        _inner = inner;
    }

    public IController CreateController(RequestContext requestContext, string controllerName)
    {
        // pass-thru to the normal factory
        var controllerInterface = _inner.CreateController(requestContext, controllerName);
        var controller = controllerInterface as Controller;
        if (controller != null)
        {
            // if we get a MVC controller then add the cookie-based tempdata provider
            controller.TempDataProvider = new CookieTempDataProvider();
        }
        return controller;
    }

    public SessionStateBehavior GetControllerSessionBehavior(RequestContext requestContext, string controllerName)
    {
        return _inner.GetControllerSessionBehavior(requestContext, controllerName);
    }

    public void ReleaseController(IController controller)
    {
        _inner.ReleaseController(controller);
    }
}
The last thing is to configure the custom controller factory, and from a separate assembly this was done via the magic of PreApplicationStartMethod which allows for code to run prior to Applicaton_Start:
[assembly: PreApplicationStartMethod(typeof(BrockAllen.CookieTempData.AppStart), "Start")]

namespace BrockAllen.CookieTempData
{
    public class AppStart
    {
        public static void Start()
        {
            var currentFactory = ControllerBuilder.Current.GetControllerFactory();
            ControllerBuilder.Current.SetControllerFactory(new CookieTempDataControllerFactory(currentFactory));
        }
    }
}
Anyway, that’s it. Feedback is always welcome.
Membership is not the same as Forms Authentication
Using Forms Authentication in an ASP.NET application is comprised of two steps:
1) Verify the user’s identity.
2) Authenticate subsequent requests from the user.
For #1: To verify a user’s identity we need to determine what database to consult. This can be done with a custom database or this can be done with Membership API and the MembershipProvider model.
For #2: To authenticate subsequent requests from the user we need a way to correlate requests from the same user and typically we use a cookie-based scheme. Forms authentication provides a framework for this and it implements it in a secure manner. Using Session to track the user is also a cookie-based scheme but it was not designed for security and should be avoided (in addition to all the other reasons).
Forms Authentication issues a cookie and embeds the username inside the cookie. Upon subsequent requests to the server Forms reads the cookie, validates it, extracts the username and assigns the username to User.Identity.Name (as well as Thread.CurrentPrincipal.Identity.Name).
To implement the cookie-based scheme securely Forms Authentication does several things:
1) Protects the cookie by encrypting and MACing it. This provides protection against people reading the cookie (including the user) and tampering with the value (including the user).
2) Provides a secure timeout on the cookie. Forms does not rely upon the normal cookie timeout — the user could easily change this. Instead Forms embeds the cookie timeout in the encrypted/MAC’d cookie value.
3) Sets the cookie as HTTP-only. This prevents client-side JavaScript from accessing the cookie (Session, to its credit, does this as well).
4) Allows the cookie to be marked as SSL-only. This, unfortunately, is not the default nor required (but I think it should for both… well, at least the default). The way this is configured is to set in web.config:
<system.web>
  <authentication mode="Forms">
    <forms requireSSL="true" />
  </authentication>
</system.web>
This will configure Forms to only allow the cookie to be issued if the login request is using SSL. It also configures the browser to only send the cookie back to the server if the request is SSL.
Protecting the request that contains the login information is obvious, but protecting the cookie on subsequent requests is equally important. We don’t want the cookie intercepted on the network and then replayed by an attacker. This is often overlooked or dismissed as not important, but think about it — if the page being requested needed authentication in the first place (presumably because it contained sensitive data like banking or healthcare information) then would we want the contents intercepted by an eavesdropper? I don’t think so, so we need to protect both the cookie and the contents of the page. It’s imperative that SSL be used for any request that uses authentication.
So, the important aspects of security really revolve around Forms Authentication and not Membership. And in fact you don’t need to use Membership to use Forms Authentication. Membership is just an abstraction around a database look-up. It’s important to distinguish and understand what each does so that you can understand how your security is really working and evaluate which pieces you really need and want.
Wow, that’s an awful title. Oh well, here we go:
When ADFS2 is being used as a R-STS for protocol transition (SAML2-P to WS-Fed, for example) the IP-STS is not aware of the original RP requesting the token. From the IP-STS’ perspective it only knows the immediate RP (which is really ADFS2 acting as a R-STS):

Sometimes it would be nice for the the IP-STS to know what the original RP was requesting the token. This would be useful for branding or tailoring claims issuance. I had a client that needed to do exactly this (he was using IdentityServer as the IP-STS), so I had to figure out how to pass along an additional parameter to IdSrv from ADFS2 to indicate the original realm requesting the token (for both for WS-Fed and SAML2-P requests). Note: doing this was very non-standard but my client was alright with this since ADFS2 was only being used as a bridge from a SAML2-P RP to WS-Fed. If WIF supported SAML2-P then using ADFS2 in the middle would not be necessary and the IP-STS would have know the realm for the RP. So yea, this is a hack/workaround. Oh well.
Anyway, in the end it was quite simple and the approach taken was mainly due to the fact that most of the code surrounding the redirect from ADFS2 to the IP was buried in the ADFS2 base classes so I was unable to modify the URL for the redirect via the ADFS2 APIs. I ended up hooking into the ASP.NET pipeline which is hosting ADFS2. What I had to do was: 1) Know how to extract the realm for the RST and 2) Know how to add the realm to the query string when ADFS2 was redirecting to the IP-STS.
For #1: Checking the RST for WS-Fed is easy — if there’s a Request.QueryString[“wtrealm”] then you’re done. But the SAML2-P RST query string param is more complicated. I had to deal with decoding, decompressing and XML-ifying the query string param (according to the SAML2-P spec), but once that was all done the RP identifier was in there.
For #2: Hooking into and modifying ADFS2’s redirect was just a matter of handling the Application_EndRequest in ASP.NET and checking for a 302 HTTP status code on the Response object. Once I know ADFS2 is redirecting, I can just extract the realm from the original query string and then do my own redirect appending the custom query string param for the IP-STS.
I won’t bother describing the rest of the details since the code can speak for itself. Here’s the code I added to global.asax in ADFS2:
void Application_EndRequest()
{
    CheckForRSTRealmAndRedirect();
}

void CheckForRSTRealmAndRedirect()
{
    if (Response.StatusCode == 302)
    {
        string realm = GetRPRealmFromUrl();
        if (realm != null)
        {
            string redirectUrl = Response.RedirectLocation;
            Response.Redirect(redirectUrl + "&rp-realm=" + realm);
        }
    }
}

string GetRPRealmFromUrl()
{
    try
    {
        string samlParam = Request.QueryString["SAMLRequest"];
        if (samlParam != null)
        {
            string urlDecodedParam = HttpUtility.UrlDecode(samlParam);
            var realm = ExtractRealmFromSamlRequest(urlDecodedParam);
            return realm;
        }
        else
        {
            string realm = Request.QueryString["wtrealm"];
            return realm;
        }
    }
    catch (Exception)
    {
    }
    return null;
}

string ExtractRealmFromSamlRequest(string urlDecodedParam)
{
    byte[] bytes = Convert.FromBase64String(urlDecodedParam);
    using (MemoryStream ms = new MemoryStream(bytes))
    {
        byte[] b = DecompressDeflate(ms);
        if (b == null) return null;

        string deflatedString = Encoding.ASCII.GetString(b);
        XmlDocument doc = new XmlDocument();
        doc.LoadXml(deflatedString);

        XmlNamespaceManager ns = new XmlNamespaceManager(doc.NameTable);
        ns.AddNamespace("saml", "urn:oasis:names:tc:SAML:2.0:assertion");
        XmlNode node = doc.SelectSingleNode("//saml:Issuer", ns);
        return node.InnerText;
    }
}

byte[] DecompressDeflate(Stream streamInput)
{
    using (Stream streamOutput = new MemoryStream())
    {
        int bytesRead = 0;

        try
        {
            byte[] readBuffer = new byte[4096];
            using (DeflateStream stream = new DeflateStream(streamInput, CompressionMode.Decompress))
            {
                int i;
                while ((i = stream.Read(readBuffer, 0, readBuffer.Length)) != 0)
                {
                    streamOutput.Write(readBuffer, 0, i);
                    bytesRead = bytesRead + i;
                }
            }
        }
        catch (Exception)
        {
            return null;
        }

        byte[] buffer = new byte[bytesRead];
        streamOutput.Position = 0;
        streamOutput.Read(buffer, 0, buffer.Length);
        return buffer;
    }
}
In the IP-STS’ login page it’s just a matter of looking for the “rp-realm” query string param:
public ActionResult SignIn(string returnUrl)
{
    var url = HttpUtility.UrlDecode(returnUrl);
    var marker = "rp-realm=";
    var idx = url.IndexOf(marker);
    if (idx >= 0)
    {
        idx += marker.Length;
        var idx2 = url.IndexOf('&', idx);
        if (idx2 < 0) idx2 = url.Length - idx;
        var rp_realm = url.Substring(idx, idx2);
    }

    ViewBag.ReturnUrl = returnUrl;
    ViewBag.ShowClientCertificateLink = ConfigurationRepository.Configuration.EnableClientCertificates;

    return View();
}
Presumably the IP-STS would then use rp-realm to perform any branding or customization necessary.
Mobile support in MVC 3
Given that I just did a webcast on mobile support in MVC 4, I thought it fitting to discuss how essentially the same mobile support can be achieved today in MVC 3. In a fairly simple way we can build a similar framework to what will be provided in the next version.
I want these requirements (which are comparable to what we get in MVC 4):
- I don’t want a controller action to have to fret about what view to deliver based upon the client device (mobile vs. non-mobile).
- I want a mobile view to be delivered if there is a view that conforms to a particular naming convention (such as Index.Mobile.cshtml).
- I only want a render the mobile view if the client device is a mobile device (this one is sort obvious).
To alleviate the controller of the logic to decide if a mobile view should be rendered or not we will develop an action filter. This allows common functionality to extracted into one location yet applied to multiple controllers and actions.
To dynamically discover if we have a mobile version of a view we’ll have to ask the MVC plumbing a few questions, but it’s not difficult.
To know if the current request is from a mobile device, we’ll simply ask ASP.NET :)
Here’s the action filter:
public class MobileAttribute : ActionFilterAttribute
{
    public override void OnResultExecuting(ResultExecutingContext filterContext)
    {
        // is the request a view and is the client device a mobile device
        var vr = filterContext.Result as ViewResult;
        if (vr != null &&
            filterContext.HttpContext.Request.Browser.IsMobileDevice)
        {
            // determine from the current view what the mobile view name would be
            var viewName = vr.ViewName;
            if (String.IsNullOrWhiteSpace(viewName)) viewName = (string)filterContext.RouteData.Values["action"];
            var fileExtension = Path.GetExtension(viewName);
            var mobileViewName = Path.ChangeExtension(viewName, "Mobile" + fileExtension);

            // ask MVC is we have that view
            var ver = ViewEngines.Engines.FindView(filterContext, mobileViewName, vr.MasterName);
            if (ver != null && ver.View != null)
            {
                ver.ViewEngine.ReleaseView(filterContext, ver.View);

                // we do, so tell MVC to use the mobile view instead
                vr.ViewName = mobileViewName;
            }
        }
    }
}
And here’s the action filter applied to a controller:
[Mobile]
public class HomeController : Controller
{
    public ActionResult Index()
    {
        return View();
    }
}
Of course, this could also be applied globally in the MVC application.
So this shows: 1) How easy it is to have mobile support in MVC versions prior to MVC4, and 2) How powerful action filters are at providing interception into the MVC framework.
Sample code here.
Demos – Mobile support in MVC4 and jQuery Mobile
Thanks everyone for coming to the webcast on MVC 4 and jQuery Mobile.
The recording should be available soon on the DevelopMentor webcasts page.
You can access the demos here.
Think twice about using RoleProvider
It’s a common misunderstanding that the RoleProvider in ASP.NET is the only means for populating a user’s roles in ASP.NET. The RoleProvider was introduced in ASP.NET 2.0, so prior to 2005 we did without.
In essence what’s needed to populate roles in ASP.NET is to have some code in the HTTP pipeline handle the PostAuthenticateRequest event and then load the roles for a user and populate the HttpContext.User and Thread.CurrentPrincipal properties in global.asax, as such:
void Application_PostAuthenticateRequest(object sender, EventArgs e)
{
    var ctx = HttpContext.Current;
    if (ctx.Request.IsAuthenticated)
    {
        string[] roles = LookupRolesForUser(ctx.User.Identity.Name);
        var newUser = new GenericPrincipal(ctx.User.Identity, roles);
        ctx.User = Thread.CurrentPrincipal = newUser;
    }
}
That wasn’t so bad.
So often people get pigeonholed into thinking they must use a RoleProvider because it’s some magical part of the infrastructure. In fact the RoleProvider is simply abstracting a database lookup. It has other APIs to manage roles (create roles, add/remove users to/from roles, etc.), but if all you need in your application is to load roles for the current user the RoleProvider might be too heavy weight for your needs.
Supporting SAML2-P RPs with ADFS2 as a R-STS
In my previous post (related to ADFS2) I mentioned how my client was using ADFS2 not as an identity provider but rather as a broker between a Java RP which used SAML2-P and thinktecture’s IdentityServer IP-STS which uses WS-Fed:
This configuration wasn’t working out of the box and the RP was failing to accept the token response. To try to reproduce the error I setup a local RP that issued SAML2-P token requests. The test RP I used came from the CTP of WIF Extensions for SAML 2 Protocol and when I ran this SAML-P client the error I got was:
Turns out the problem is some discrepancy between WIF and/or ADFS2 when the IP-STS issues a SAML 2 token over WS-Fed to ADFS2 and then ADFS2 returns the token over SAML2-P to the RP. There’s something about the Subject attribute that’s lost in translation so then ADFS2 issues a non-success status to the SAML2-P RP. This whole situation was discovered and then further explained to me by Dominick. Also, to help diagnose this problem I used the most excellent SAML and WS-Fed Troubleshooter.
Anyway, the solution was to change the token type IdSrv was issuing from a SAML 2 token to a SAML 1.1 token. Once I made this configuration change (and restarted IdSrv) it was working fine.
Also, after I got this working I wondered if the actual problem was a flaw in IdSrv’s implementation (and not an issue with WIF and/or ADFS2). To test this I setup a scenario where the SAML2-P RP connected to a R-STS ADFS2 which then connected to another instance of ADFS2 acting as the IP-STS. To my surprise this configuration worked out of the box (after I removed the SAML2-P configuration from the ADFS2->ADFS2 trust relationship in order to force WS-Fed). It turns out that in this configuration the IP-STS ADFS2 was issuing a SAML 1.1 token to the R-STS ADFS2! I really wanted to see this configuration fail (and thus proving it was not a problem in IdSrv) and so I searched and searched for a way to configure ADFS2 to only issue SAML 2 tokens but I could not. It seems that for WS-Fed ADFS2 only issues SAML 1.1 tokens but for SAML2-P it issues SAML 2 tokens. Go figure.
Mobile support in MVC4 and jQuery Mobile
ADFS2 can be used as a resource STS (R-STS) instead of as an identity provider STS (IP-STS). A client of mine was using ADFS2 in this way because they needed SAML2-P support. ADFS2 was essentially brokering between the RP using SAML2-P and the IP-STS (which was thinktecture‘s IdentityServer (IdSrv)) which was using WS-Fed:
IdSrv was the only identity provider they wanted to use but ADFS2 was still displaying its home realm discovery (HRD) screen and asking the user which IP they wanted to use to authenticate because you can’t disable the ActiveDirectory claims provider trust in ADFS2. My client didn’t like this; they wanted to skip the HRD and redirect immediately to IdSrv.
Modifying the HRD and Login screens is allowed (if not supported) in ADFS2, but I suspect eliminating AD as a STS is frowned upon (if not unsupported). Sorry Microsoft — my client didn’t want AD in there. So to achieve this we modified the HomeRealmDiscovery.aspx.cs page to automatically choose IdSrv. It was as simple as removing two lines and adding one line of code:
protected void Page_Init( object sender, EventArgs e )
{
    // don't bother building the list of IPs
    // PassiveIdentityProvidersDropDownList.DataSource = base.ClaimsProviders;
    // PassiveIdentityProvidersDropDownList.DataBind();

    // automatically choose the IP we want
    // pass the claims provider identifier as configured in ADFS2
    SelectHomeRealm("http://identityserver.thinktecture.com/trust/initial");
}
For those using ADFS2 for a while this approach is nothing new, but when searching for how to disable AD in ADFS2 not much turned up. HTH.
HTTP status codes for REST
While developing the upcoming Essential REST course for DevelopMentor, I thought it would be useful to put together a chart illustrating the common HTTP status codes used for each of the common HTTP methods. This isn’t exhaustive and many of the status codes below might be issued by the infrastructure and not directly by your application code, but I think this is useful in keeping in mind the sorts of things your code might need to return.
| method | status | phrase | request headers | response headers | content in response | note |
| GET | 200 | OK | ETag | Yes | ||
| 304 | Not Modified | If-None-Match | ETag | resource has not changed since read | ||
| 401 | Unauthorized | WWW-Authenticate | ||||
| 404 | Not Found | |||||
| 405 | Method Not Allowed | Allow:GET, … | ||||
| 406 | Not Acceptable | Accept | server doesn’t have the content type requested | |||
| 410 | Gone | was here but not anymore | ||||
| 500 | Server Error | |||||
| 503 | Service Unavailable | request can be retried later | ||||
| POST | 201 | Created | Location, ETag | Optional | ||
| 400 | Bad Request | e.g. validation error | ||||
| 401 | Unauthorized | WWW-Authenticate | ||||
| 405 | Method Not Allowed | Allow:GET, … | ||||
| 415 | Unsupported Media Type | Content-Type | server doesn’t support that content type | |||
| 500 | Server Error | |||||
| 503 | Service Unavailable | request can be retried later | ||||
| PUT | 200 | OK | ETag | Yes | ||
| 204 | No Content | ETag | ||||
| 400 | Bad Request | e.g. validation error | ||||
| 401 | Unauthorized | WWW-Authenticate | ||||
| 404 | Not Found | |||||
| 405 | Method Not Allowed | Allow:GET, … | ||||
| 409 | Conflict | can’t update due to state of resource | ||||
| 412 | Precondition Failed | If-Match | ETag | resource has changed since read | ||
| 415 | Unsupported Media Type | Content-Type | server doesn’t support that content type | |||
| 500 | Server Error | |||||
| 503 | Service Unavailable | request can be retried later | ||||
| DELETE | 204 | No Content | ||||
| 401 | Unauthorized | WWW-Authenticate | ||||
| 404 | Not Found | |||||
| 405 | Method Not Allowed | Allow:GET, … | ||||
| 412 | Precondition Failed | If-Match | resource has changed since read | |||
| 409 | Conflict | can’t update due to state of resource | ||||
| 500 | Server Error | |||||
| 503 | Service Unavailable | request can be retried later |
I prefer to use FireFox as my browser, but one downside is that it doesn’t display XML very well (and it seems this is a problem due to some conflict with Firebug). Now that I’m looking into WebApi more, the default content negotiation prefers to render XML due to the default “Accept” HTTP header that FireFox sends. Well, if you’d prefer to see JSON then it’s easy enough to change the default:
- In the address bar in FireFox, type “about:config”.
- Click the “I promise” button.
- In the search bar type “network.http.accept.default”.
- Double-click the setting.
- In the comma-separated list add a new value of “application/json” (without the quotes) . For me, I used “application/json;q=0.9” to lower the precedence compared to HTML.
Now when I use FireFox to view WebApi results it defaults to JSON and not XML. And with JSONView it’s easy to visualize the results.
WIF on Windows XP and Cassini
WIF isn’t officially supported on XP (and it won’t even install), but you can ~/bin deploy it (you need to for Azure deployment). So this means you can basically develop with WIF on XP, but if you’re using Cassini as your web server then you’ll run into this bizarre exception (with a lousy stack trace too):
“Type is not resolved for member Microsoft.IdentityModel.Claims.ClaimsPrincipal”
Turns out that it’s an issue with Cassini and custom IIdentity implementations. One workaround is to copy Microsoft.IdentityModel.dll to “C:\Program Files\Common Files\Microsoft Shared\DevServer\10.0″. The other workaround is to GAC install Microsoft.IdentityModel.dll.
Cookieless session considered dangerous
Another question came up: “What if users disable cookies – won’t session break?”. Yes. So will Forms Authentication and the Anonymous Identification Module. And so will half the web.
But wait — session state, forms authentication and the anonymous identification modules all have cookieless modes. Surely if that’s an option it’s fine to use, right? At my first job out of college I learned a lot and my favorite quote from a fellow employee named Jerry McCaffery was “Just because you can, doesn’t mean you should“. I love that quote.
Yes, those all have cookieless modes, but it’s insecure — it’s far too easy to share session IDs with other users. Here’s the problem: Say a bad guy goes to your product website and gets a URL with a session ID. They then send out a spam email for some product on your website to a million people and just one of those people follows the link. Image that person is then active in the application, adds the product to their shopping cart and starts to enter personal information (billing information, shipping address, etc.) which is then stored in that session. The problem is that the bad guy still has the same URL with the same session ID. They can come back to the website after the user and perhaps see the same session data that the other person entered.
Sure, you can try to take steps to avoid this, but it’s an extra attack vector you have to keep in mind that you (or a new hire, say) normally wouldn’t (and would probably forget about eventually). Simply not using the cookieless modes for session, et. al. avoids this attack vector entirely.
I think the irony here is that this feature exists because paranoid users think it’s more secure to completely disable cookies (instead of just persistent cookies).
Think twice about using session state
So this question comes up all the time: “Where should I keep my shopping cart data for my application?” The common knee-jerk response is “use session state”. I find this to typically be the wrong answer if you want to build a resilient and scalable application.
Session state was originally meant for this kind of data (user provided data like a shopping cart). One thing session is not meant for is caching of user profile data. Back in classic ASP there were not a lot of other caching per-user data, so session was the obvious choice, but in ASP.NET (and just .NET in general) there are so many better options. One such example is the data cache in ASP.NET. With the data cache you specifically code to deal with failure (the cache item might not be present) and you can also set very specific conditions per cache item designating how long you’d like the cache the item. The data cache is very useful for a place to store data when you want to avoid round trips tot he database. But why not use session? Wouldn’t be essentially the same since it is also stored in-memory? Read on…
So back to session state as a place to store user driven data (i.e. shopping cart)… Session state is stored in-memory by default. This is a horrible option if you want to remember data for your users. In ASP.NET the hosting application pool frequently recycles and this is typically out of your control. This means that all that in-memory state is lost, which is why using session state in-proc is a bad choice. If you’re going to the effort to keep this data for the users, you simply can’t rely upon in-memory state — think shopping cart which equates to making sales on your website or simply the frustration of your users when all their data is lost and you have to make them start all of their shopping over again.
As an alternative you can store your session out-of-proc (in the ASP.NET State Service which is a windows service or in SQL Server or in a custom store). This certainly makes the state more resilient, but there is a cost to this resiliency. Each HTTP request into the application means that your application must make 2 extra network requests to the out-of-proc store — one to load session before the request is processed and another to store the session back after the request is done processing. This is a fairly heavy-weight request as well because the state being loaded is the entire state for the user for the entire application. In other words if you have ten pages in your application and each one puts a little bit of data into session, when you visit “page1” then you’re loading all of the session data for “page1”, “page2”, “page3”, etc. By the way, these extra network requests happen on every page even if you’re not using session on the page. There are some optimizations (EnableSessionState on the Page and SessionStateAttribute for MVC), but they don’t solve the problem entirely because the network request must happen to update the store to let it know the user is still active so that it doesn’t cleanup inactive sessions.
So back to caching briefly: this is why we prefer to use the data cache for caching and not session. If you’re using session for any user generated data, then you can’t keep it in-proc and you should keep it out-of-proc and once it’s out-of-proc then that defeats the purpose of caching. The data cache is for read-only data that can be reloaded from the original data source when the cache expires and session is meant for user driven data like shopping carts. Except session has all these problems…
So what to do for our shopping cart data? Here’s what I suggest: 1) explicitly disable session in your application’s web.config (it’s enabled by default in the machine-wide web.config), 2) keep the user data elsewhere. Elsewhere might mean in a cookie, in a hidden field, in the query string, in web storage or in the database (relational or NoSQL). Which one’s the right answer? As always, it depends. For shopping cart like data, I’d probably use the database. I’d create a custom “shopping cart” table and as users add items then you make network call to update the database. Once the user places the order then you’d clear out rows for the user’s shopping cart. As for the key in the shopping cart table you can simply use the user’s unique authentication username from User.Identity.Name.
So the complaints about my conclusion are: 1) effort, 2) network calls, 3) abandoned shopping carts and 4) what about anonymous users.
1) Some people complain that this is too much work. I’m sorry to inform you that programming is hard. Get over it. And to be honest, it’s not that hard with the modern ORMs we have of if you’re using a NoSQL database then it’s even easier. Also, this database doesn’t have to be your main production database — it could just be a database that’s for the webserver.
2) What about all these network calls? Well, if you were using session then in-proc was a non-starter and you were going to have to keep this data out-of-proc. So you were already going to incur heavy-weight network calls. With this approach only the pages that need the shopping cart data incur the network calls and the pages that don’t need the shopping cart data won’t have this burden imposed upon them. This is already better than out-of-proc session.
3) With this approach you will need to have some way to periodically cleanup abandoned shopping carts. Sure, but the application is still better off for the effort. Also, this assumes that you do want to get rid of the data, but think about amazon — they don’t ever want to get rid of shopping cart data. That data is potential sales (they remind you on every visit that you forgot to give them your money) and it’s probably useful for data mining. So maybe keeping this data is a good thing.
4) I suggest that you should use the authenticated user’s username for the key in the shopping cart table. Well, what about anonymous users? Part of the Session feature is that there is a “Session ID” associated with the user and this is sometimes quite useful. It is, but not at the expense of at of the other parts of session. So what to do? Well, there’s a little known feature in ASP.NET called the Anonymous Identification Module. This is a HttpModule whose sole purpose is to track anonymous users with an ID. If you enable this feature, then it issues a cookie with a unique ID per anonymous users. You can then access that ID in your code via Request.AnonymousID.
One last reason session is problematic: concurrent requests. Access to session (by default) is exclusive. This means that if your page makes 2 Ajax calls back to the server, ASP.NET forces one to wait while the other executes because each request is taking locks on the session. This really hampers scalability if not responsiveness. Also, with some of the new HTML5 features like Server Sent events that hold long-lived connections to the server then this can lock a user out of the server if they try to make a request at the same time.
So beware anytime someone says “use session state — it’s easy”. If something’s easy then you’re making a tradeoff. Realize what you’re trading off and just take a minute to think about a better way to store the data. Your application will be better off.
If you’ve ever been to one of my ASP.NET or MVC classes then you’ve heard this before. For those that haven’t, I’ve been meaning to write this since 2006… better late than never.
Ajax with HTML or JSON
Recently a poster on the asp.net forums asked about the difference between returning HTML or JSON from Ajax calls. Here was my answer:
airic82
Well, ya. But working doesn’t always mean its following best practices.
Sinful term! “Best practice” requires context. Usually the answer is “it depends” and thus there’s rarely “the one and only one best practice” which is what people are usually looking for.
airic82
I guess the piece I’m missing is the difference between returning HTML and JSON. Maybe there really isn’t any difference, but I’d think there was since we can specify a difference. Thanks for your help, man!
Ah, ok… so yes, there’s a difference there. If your Ajax call returns HTML this means you’ve done the UI “work” (so to speak) on the server (using WebForms, Razor, whatever) and then that HTML is returned to the browser and merged into the DOM (and merged into the DOM in one place). This might work fine, but sometimes things are more complex and this is where returning JSON might make more sense.
Returning JSON means the UI “work” (rendering) is done in JavaScript/jQuery client-side. The network bandwith is much less (JSON is more compact than HTML [or XML for that matter]). But the downside is this requires more JavaScript to do the rendering (but less server side coding). Returning JSON and thus allowing the JavaScript to build the UI from the result also allows for more complex UIs — imagine where the results means you have to update multiple elements. That’s hard to do if your’e returning a single block of HTML from the server. With JSON the client-side JavaScript can use that JSON data to update multiple parts of the UI. Also, if the client is a mobile device then it’s preferred that you return JSON as to minimize bandwith to save battery on the device.
Anyway, the answer is “it depends” — that’s the consulting answer :)
Demos – Boston CodeCamp 17
Retroactive post to provide my demos from Boston CodeCamp 17 from March, 2012. I did one talk on MVC 4 and jQuery Mobile and one talk on Introduction to Windows Identity Foundation.
The demos are here.
Assets in MVC4
Edit: The Assets feature was removed from the RTM in favor of bundling and minification.
In MVC4 they’ve added an API to centralize script and style sheet includes when rendering a complex view with partials and a layout template.
The problem is a single view might have many partials that all need the same script or style sheet. How do they “know” that the script or style sheet they depend upon is included and only once? Previously, that was up to the developer coordinating the views, partials and layout template in MVC to come up with a solution.
Now with MVC4 the Assets API provides a way for a view or a partial to indicate they require a script and for a layout template to indicate where those scripts and style sheets should be rendered:
public static class Assets

{

public static void AddScript(string scriptPath);

public static void AddScriptBlock(string block);

public static void AddScriptBlock(string block, bool addScriptTags);

public static void AddStyle(string cssPath);

public static void AddStyleBlock(string block);

public static void AddStyleBlock(string block, bool addStyleTags);

public static IHtmlString GetScripts();

public static IHtmlString GetStyles();

}
Now a partial can indicate a script or style sheet to include:
@{

Assets.AddScript("~/Scripts/jquery-1.7.1.js");

Assets.AddStyle("~/Content/Foo.css");

}

<h2>Some Partial</h2>
And the layout template can render those assets:
<!DOCTYPE html>

<html>

<head>

@Assets.GetStyles()

</head>

<body>

@RenderBody()

@Assets.GetScripts()

</body>

</html>
Detecting Browser Overrides in MVC4
In MVC4 we now have display modes. This allows view engines to somewhat encapsulate the selection of alternative views based upon some criteria (typically some aspect of the request like the User-Agent HTTP header). This is intended to be how MVC supports different rendering for mobile devices.
The default display mode will render “.Mobile” views, partials and layout templates if the client device is a mobile browser. There is also an API to override this behavior: HttpContext.SetOverriddenBrowser. This allows you to ignore the User-Agent header for a user and pretend they are using some other device. This is typically done for mobile users that desire the “normal” desktop version of the website instead of the mobile version.
The way you check for this overridden User-Agent or HttpBrowserCapabilities is to call: HttpContext.GetOverriddenUserAgent or HttpContext.GetOverriddenBrowser. This pair of methods will return the overridden value or the normal value if there is no override. When I first saw this behavior I was a little upset because there’s no API to determine if we’re currently in override mode or not.
I suppose the only way around this is to call Request.UserAgent or Request.Browser to check the actual device’s values.
Demos – Boston Azure Cloud User Group, February, 2012
Retroactive post to provide my demos from my talk at the Boston Azure Cloud User Group on Solving Access Control in the Cloud – from WIF to ACS from February, 2012.
Slides and demos can be found here.
Demos – Boston CodeCamp 16
Retroactive post to provide my demos from Boston CodeCamp 16 from October, 2011. I did two talks on Introduction to MVC and one talk on Introduction to Windows Identity Foundation.
The demos are here.
If you’re ~/bin deploying MVC (or more specifically “ASP.NET Web Pages with Razor syntax”) and you’re having a problem with your login URL redirects (with FormsAuthentication or WIF for that matter) then let me help you. Prior to ~/bin deployment your login redirects were working fine. You’d go to some URL and you’d get redirected to your custom login page as configured in web.config, such as this (note the non-standard loginUrl):
<authentication mode="Forms">
<forms loginUrl="~/Account/Auth/Login"/>
</authentication>
But now that you’ve ~/bin deployed MVC anytime you are redirected to a login page it’s this URL instead (note the URL is different than the one configured above):
~/Account/Login?ReturnUrl=the-path-you-were-not-authorized-for
Dominick just had this problem earlier today (but since it wasn’t my problem at the time I didn’t help him out… sorry Dom). Coincidentally I ran into the same issue later in the same day (and since it was now my problem I spent the time to look into it) . Anyway, to solve the problem you need to disable something called “simple membership”. To fix go into web.config and add this:
<appSettings>
<add key="enableSimpleMembership" value="false"/>
</appSettings>
And now you should be all set. If you want to know what the underlying problem is read on.
What’s happening is that when you ~/bin deploy MVC and Razor, the Razor DLLs are auto-registering some pre-App_Start code to run (which I thought was a neat idea, until now). For the curious it’s WebMatrix.WebData.PreApplicationStartCode.SetupFormsAuthentication from WebMatrix.WebData.dll. If this assembly is not ~/bin deployed then this pre-App_Start code doesn’t run. This pre-App_Start code will force Forms authentication to be enabled (with the login URL at the aforementioned path) unless it finds config data telling it otherwise. Here’s the kicker: the absence of any config data is sufficient to enable this feature. You have to explicitly disable it (as described above). This is quite annoying.
Sir Haack, plz fix (or make the VS tooling add this to the .config when you add deployable dependencies).
Edit: The way to avoid all of this is to simply not check “ASP.NET Web Pages with Razor syntax” (even though it’s quite tempting given the name) when ~/bin deploying. Phil did mention this in his post on the topic, but that detail escaped me when I was doing this in VS. Thx for the followup Phil.
Edit 2: Also seems there’s a .config setting to be able to use simple membership but to keep the login page controlled by your app:
<appSettings>
    <add key="PreserveLoginUrl" value="true" />
</appSettings>

